Module 3 Lab 2 - Deploy the Account Process API
Overview
In lab 1 of this Module we have enhanced our Account Process API
We will now redeploy this API, all other configuration are already prepared for you.
1 Deploy the API
Some of the steps are a repetition of Module 2 Lab 3
CloudHub is the iPaaS component of Anypoint Platform - a global, fully-managed, multi-tenanted, secure, and highly available platform for APIs and integrations.
|
If you want to learn more about CloudHub please visit: https://www.mulesoft.com/platform/saas/cloudhub-ipaas-cloud-based-integration |
1.1 (OPTIONAL) Connect Production Environment with Anypoint Studio
|
These steps are optional if you have already setup the environment client_id and client_secret in Module 2 Lab 3. If so, skip to Step 1.2 |
In order to deploy managed APIs to CloudHub we need to configure the environment in Anypoint Studio. We need to obtain client_id and client_secret from Anypoint Platform.
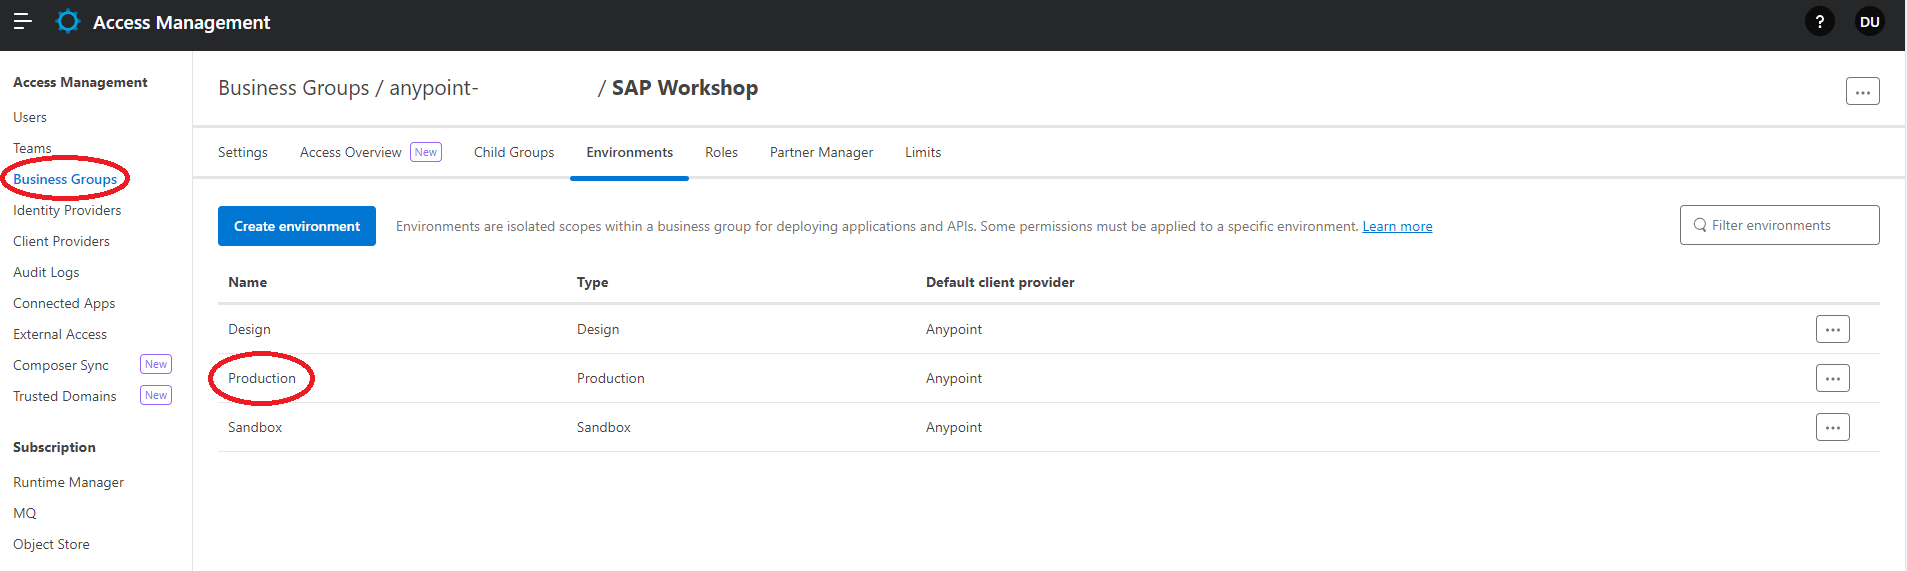
Navigate to Anypoint Platform in your browser and open Access Management. In the left-hand navigation, click Environments and then click on Production
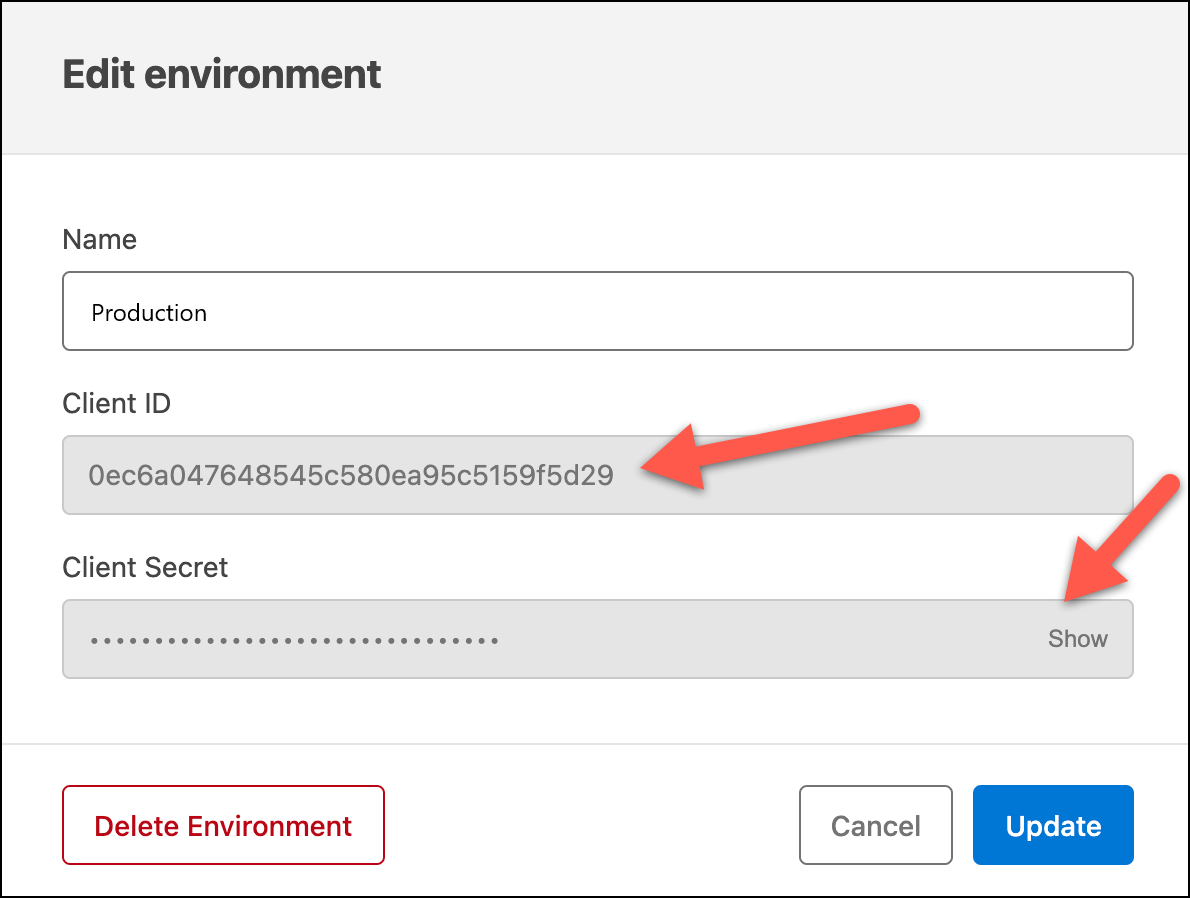
Click Show to see the client_secret and then leave the window as is and navigate back to Anypoint Studio.
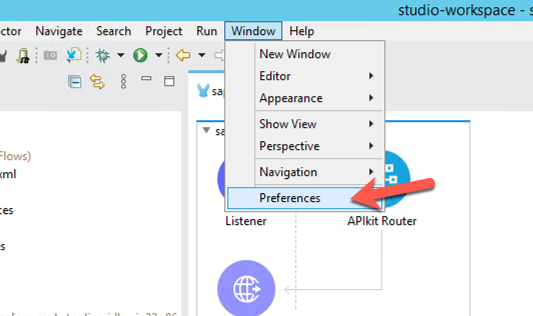
Switch back to Anypoint Studio and if you’re in Windows OS, click on Window > Preferences.
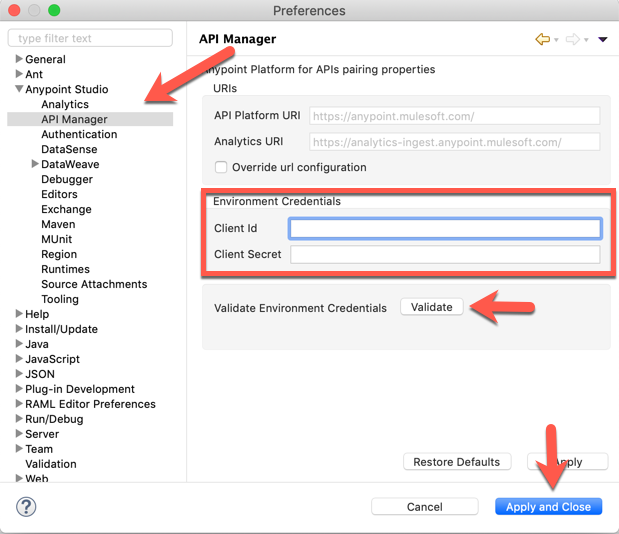
Expand the nodes on the left-hand navigation and go to Anypoint Studio > API Manager. In there, copy and paste the Client ID and Client Secret from Anypoint Platform into the Client Id and Client Secret fields under Environment Credentials.
Click on Validate and if it was configured successfully, you should see a green check mark.
Click Apply and Close to close the window.
| By skipping this optional step, we are assuming that the environment we are working on is the Sandbox environment. |
1.2 Deploy
We can deploy application directly using Anypoint Studio, however in real world scenarios of course the deployment process can be integrated in a CI/CD pipeline for example with Jenkins and Git.
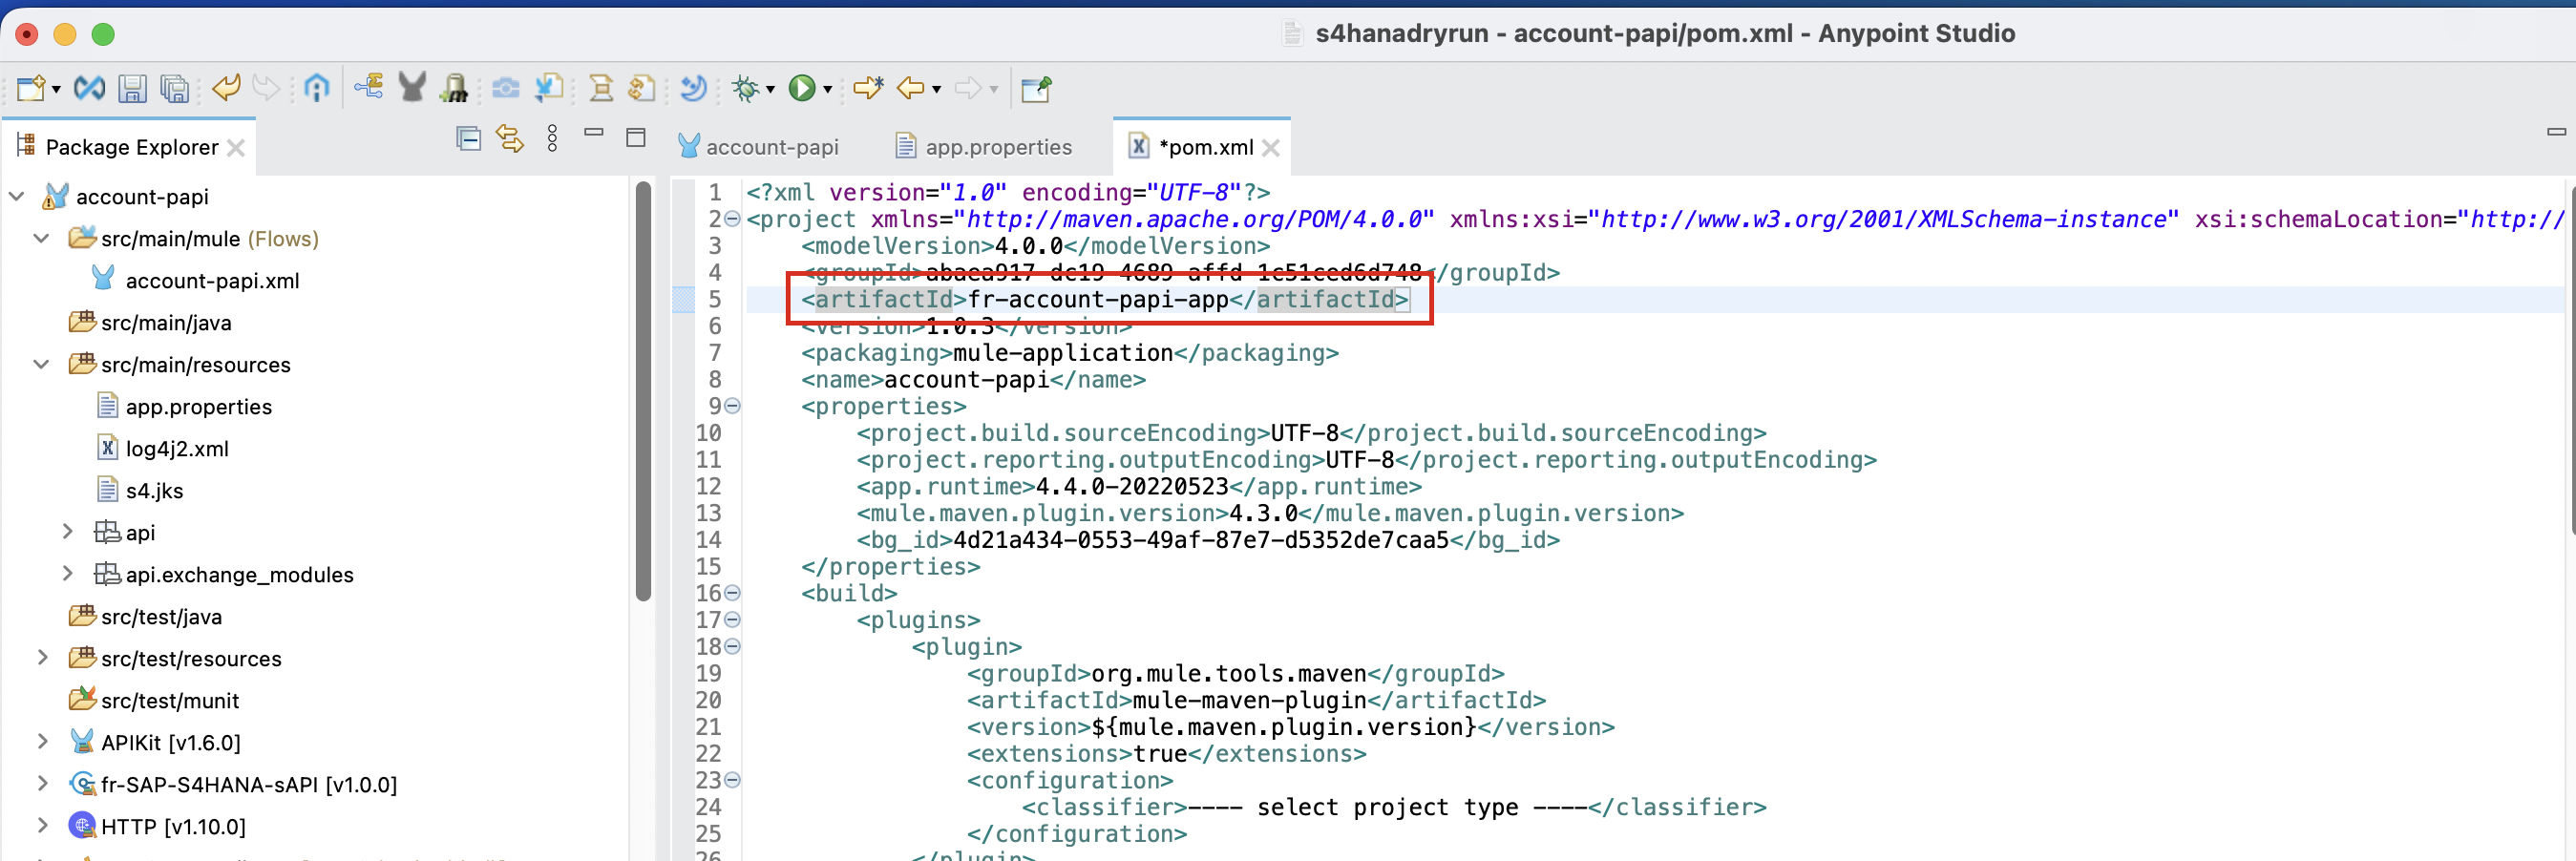
First, we need to change the name of the artifactId. Open the pom.xml file and append your initials. It should look similiar to the screenshot below.
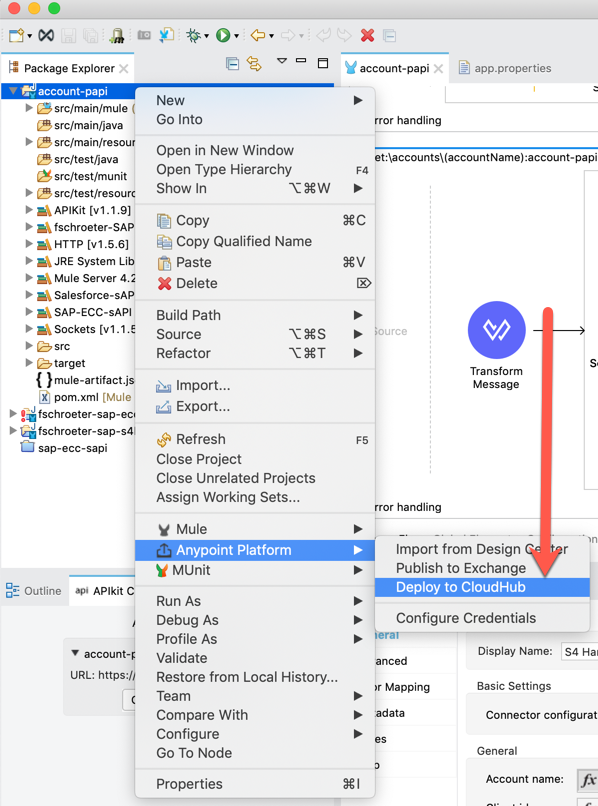
Navigate to your application in the Package Explorer and right-click on the root folder and select Anypoint Platform > Deploy to CloudHub
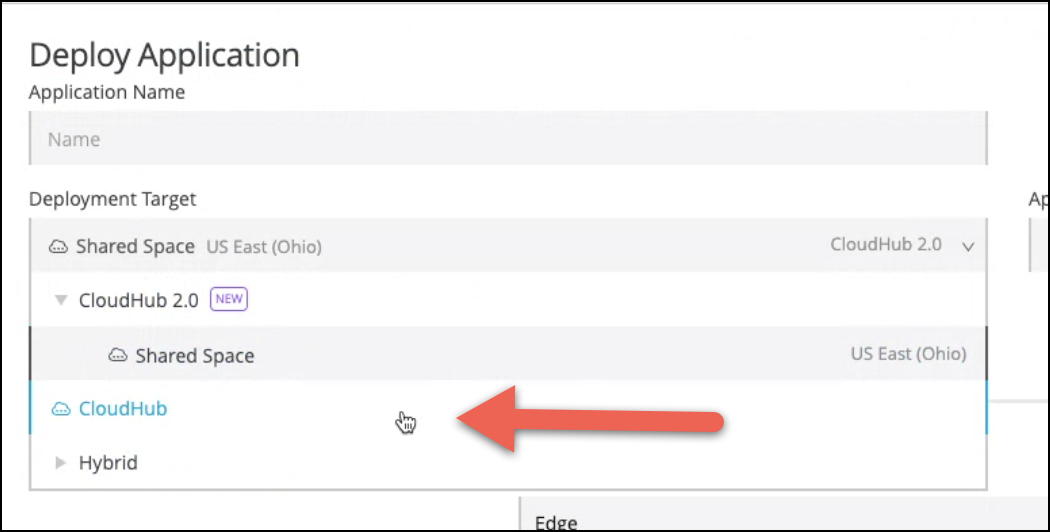
A new window will open up. Please select the Sandbox Environment for your deployment
| Shared Space will be the default Deployment Target. |
Change the Application Name to something like the following:
Application Name: <username>-account-papi
|
CloudHub application names need to be globally unique. If your application name is already taken please modify until a green checkmark is shown. |
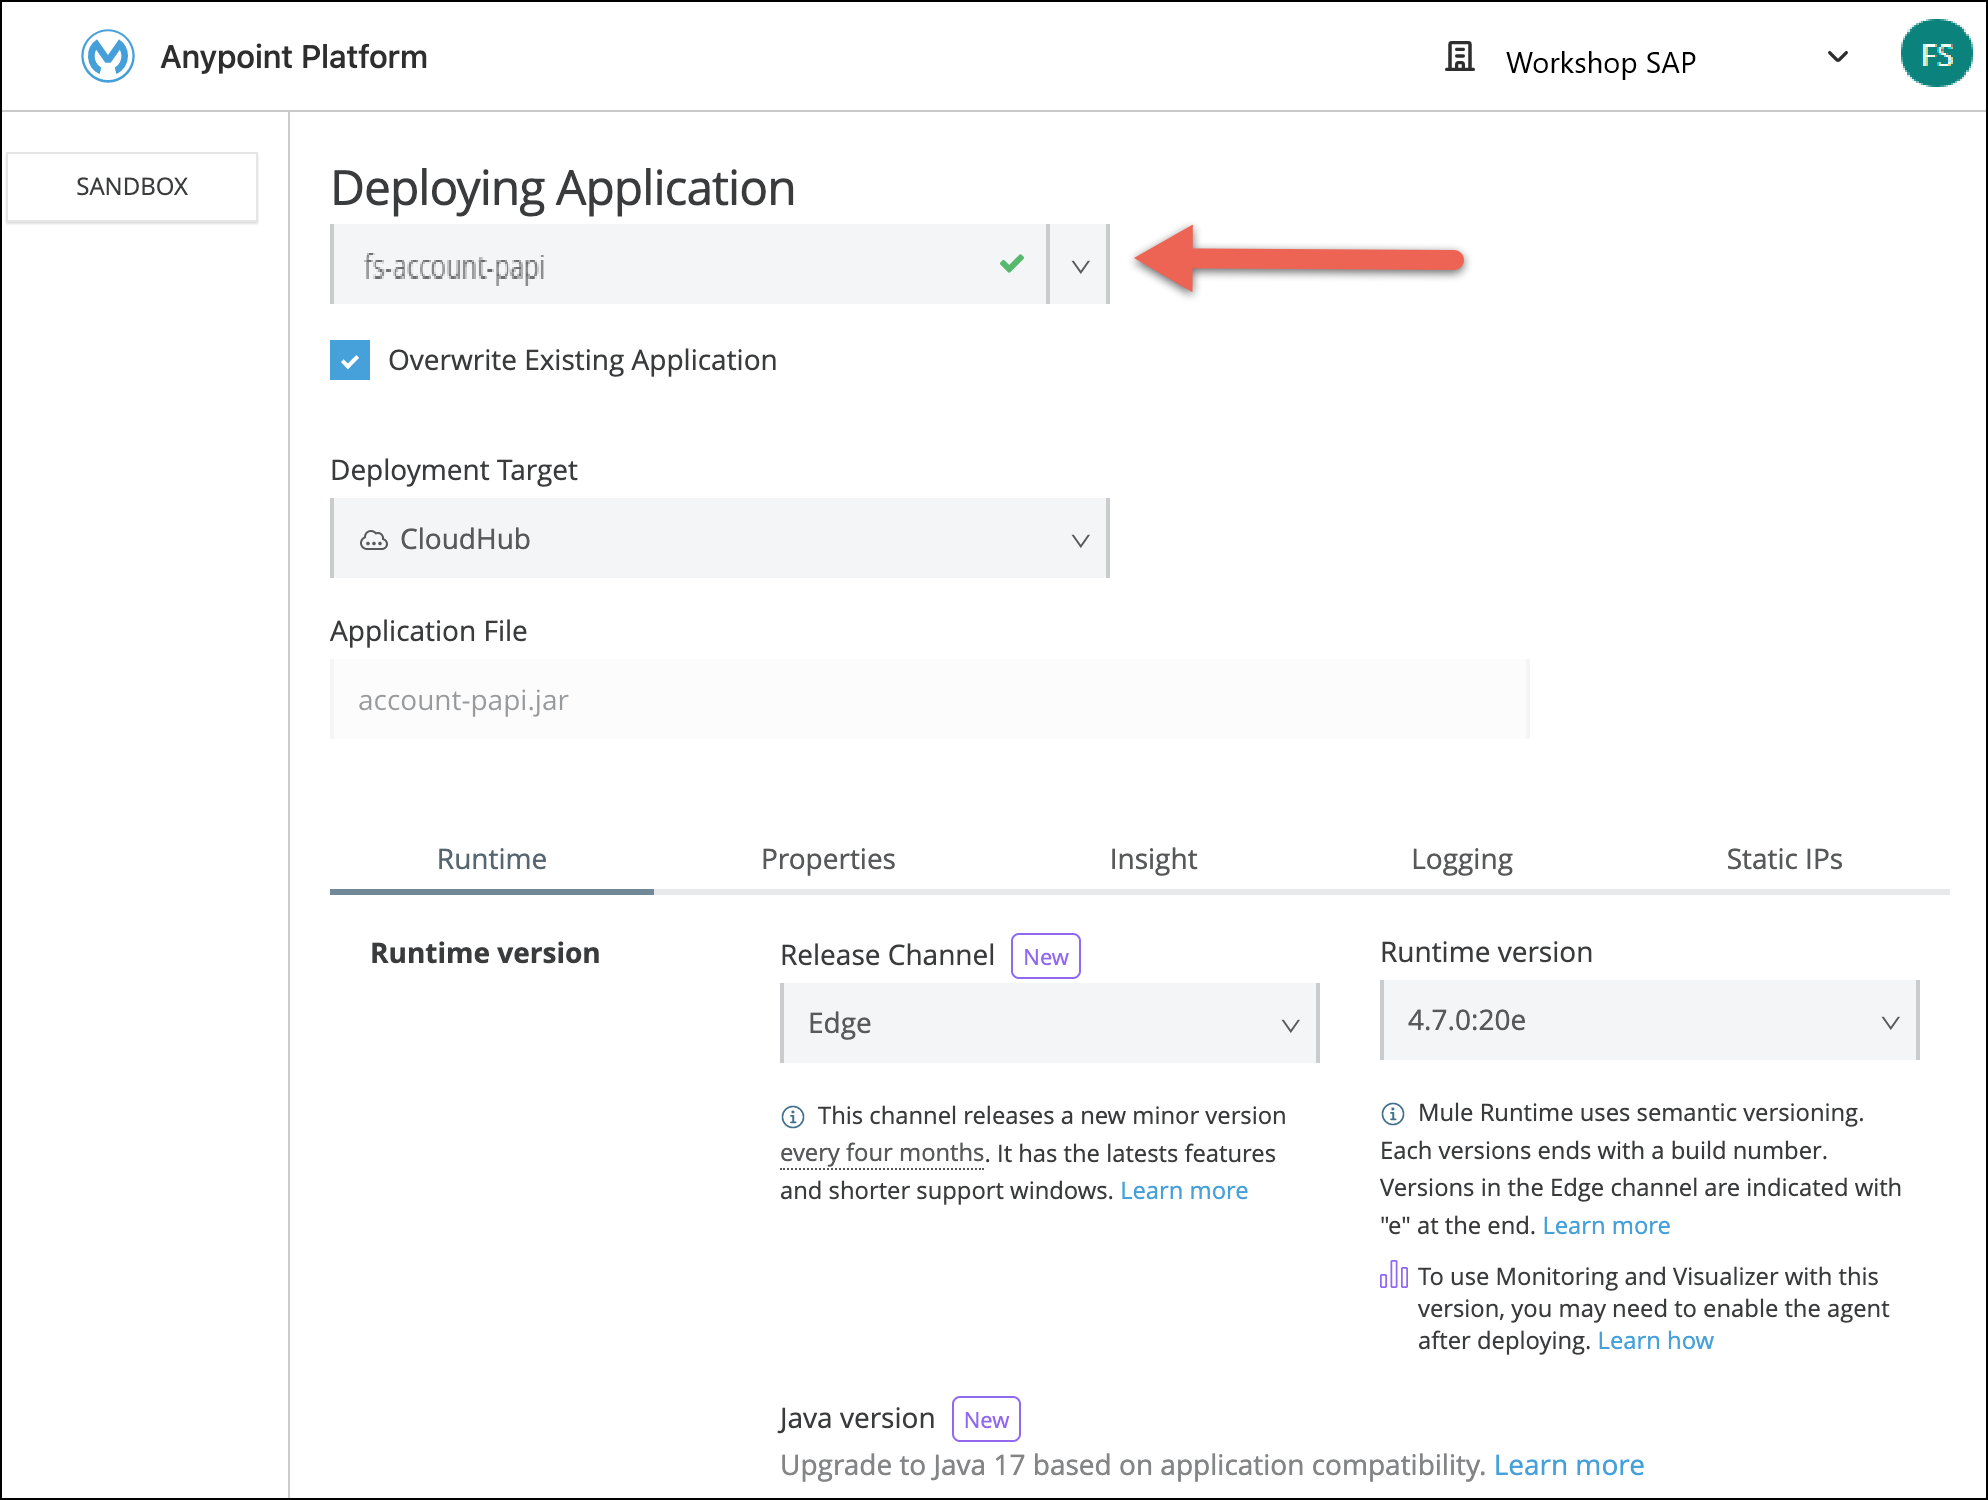
Navigate to the Properties tab and paste the value anypoint.platform.config.analytics.agent.enabled=true in the textfield. We’ll need this enabled for Anypoint Visualizer which we will cover in a later module.
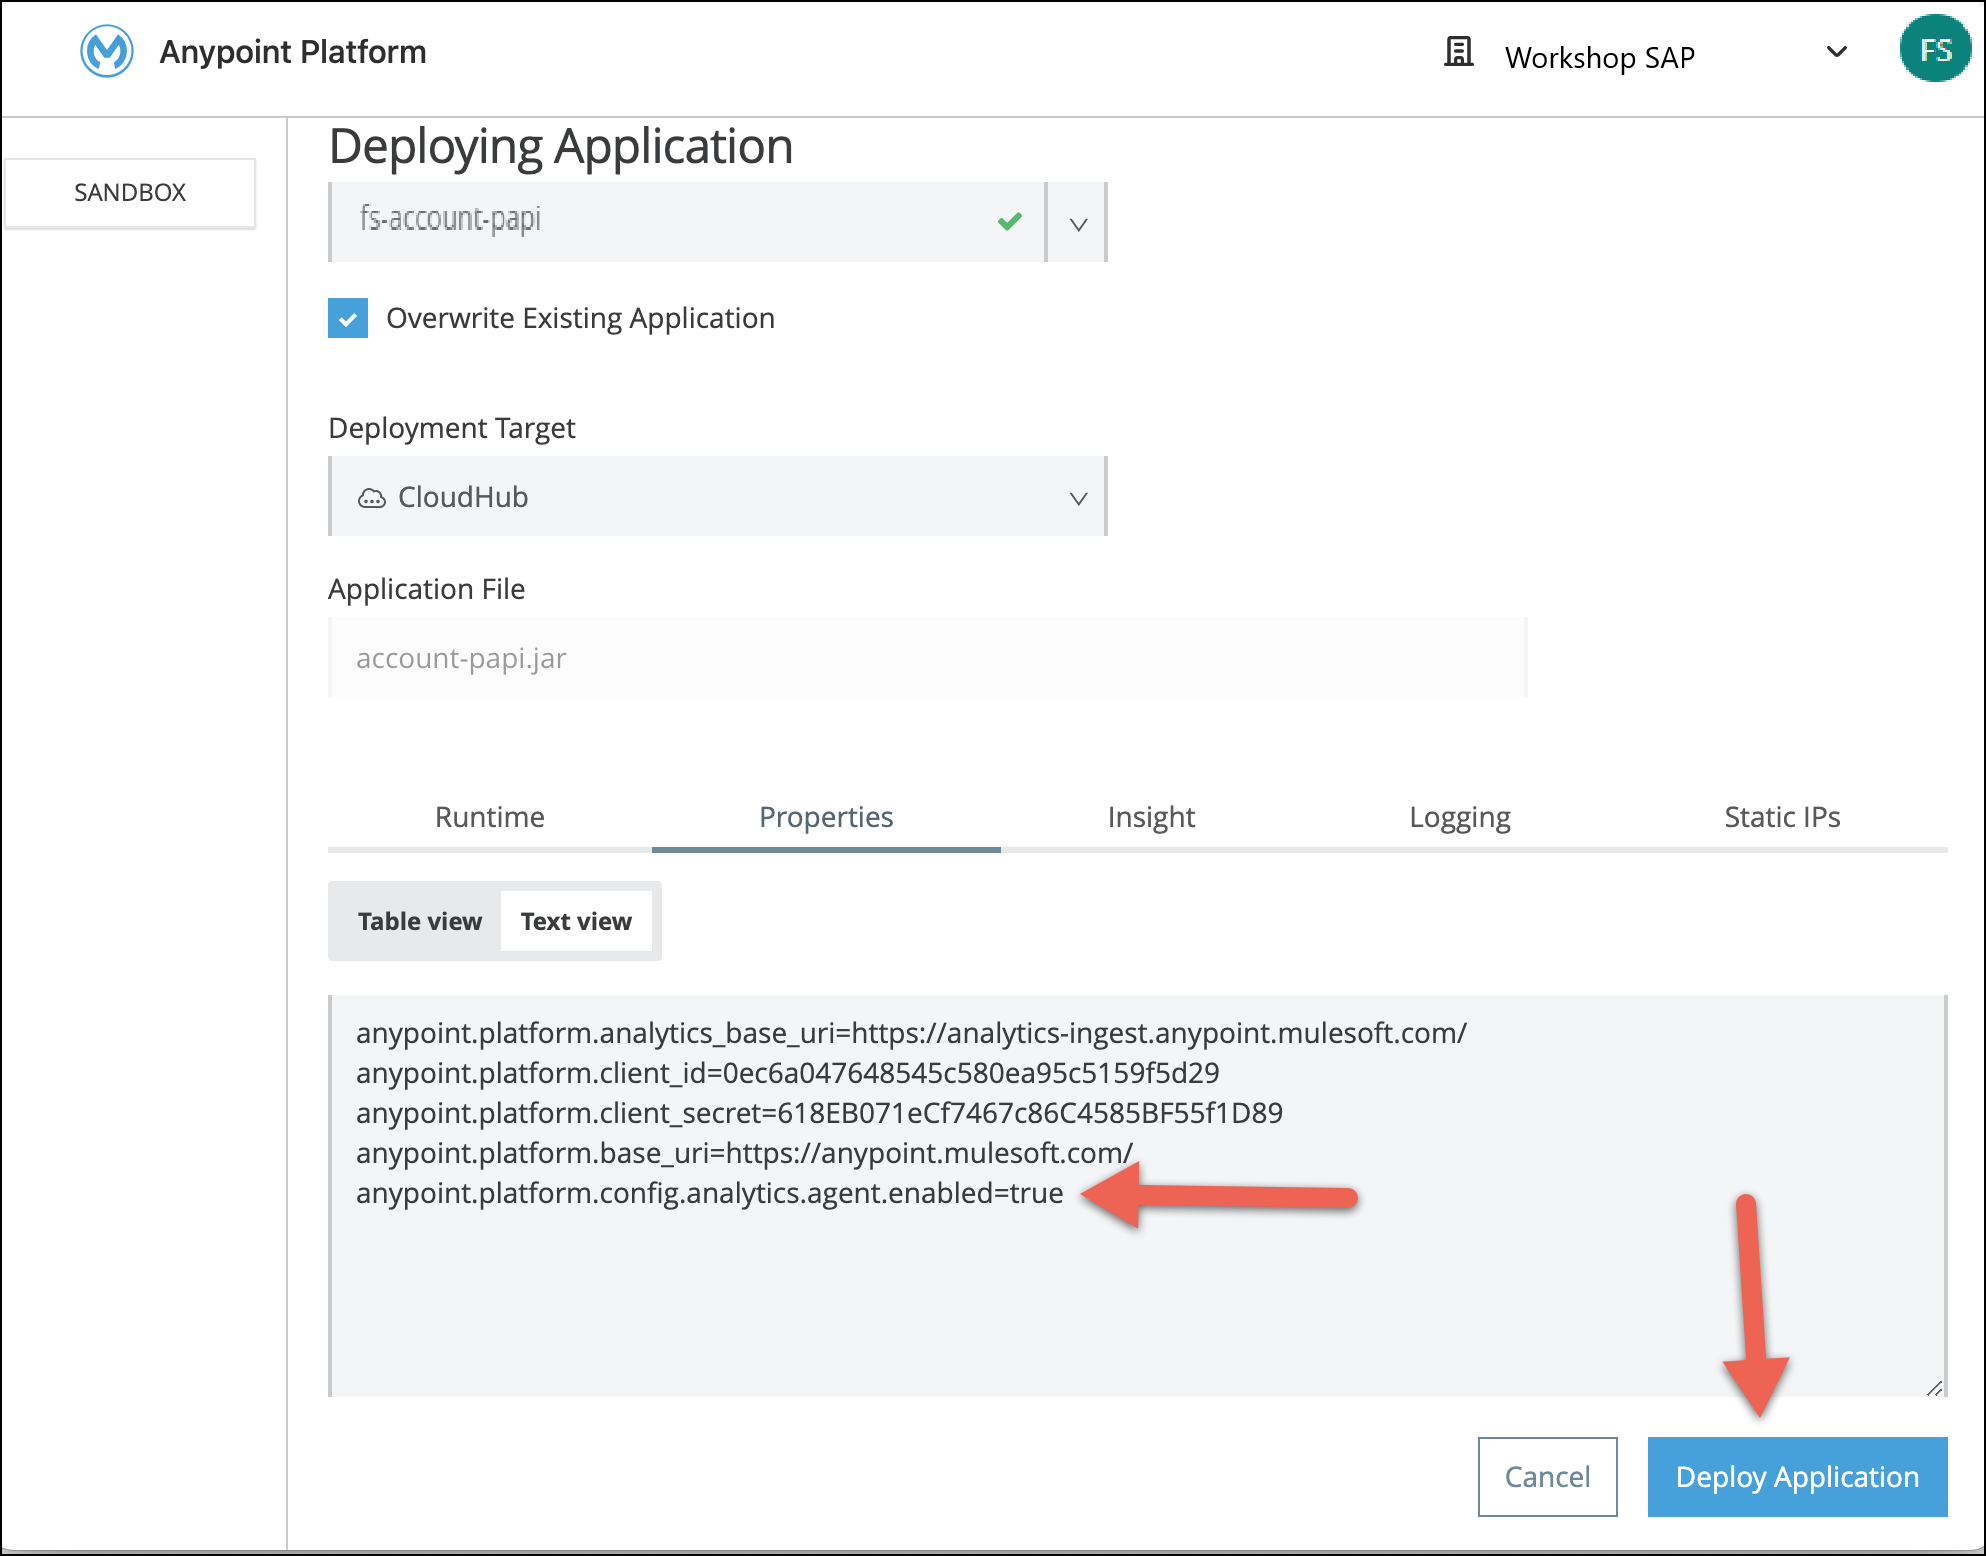
In order to fill the values for anypoint.platform.client_id and anypoint.platform.client_secret, follow these steps:
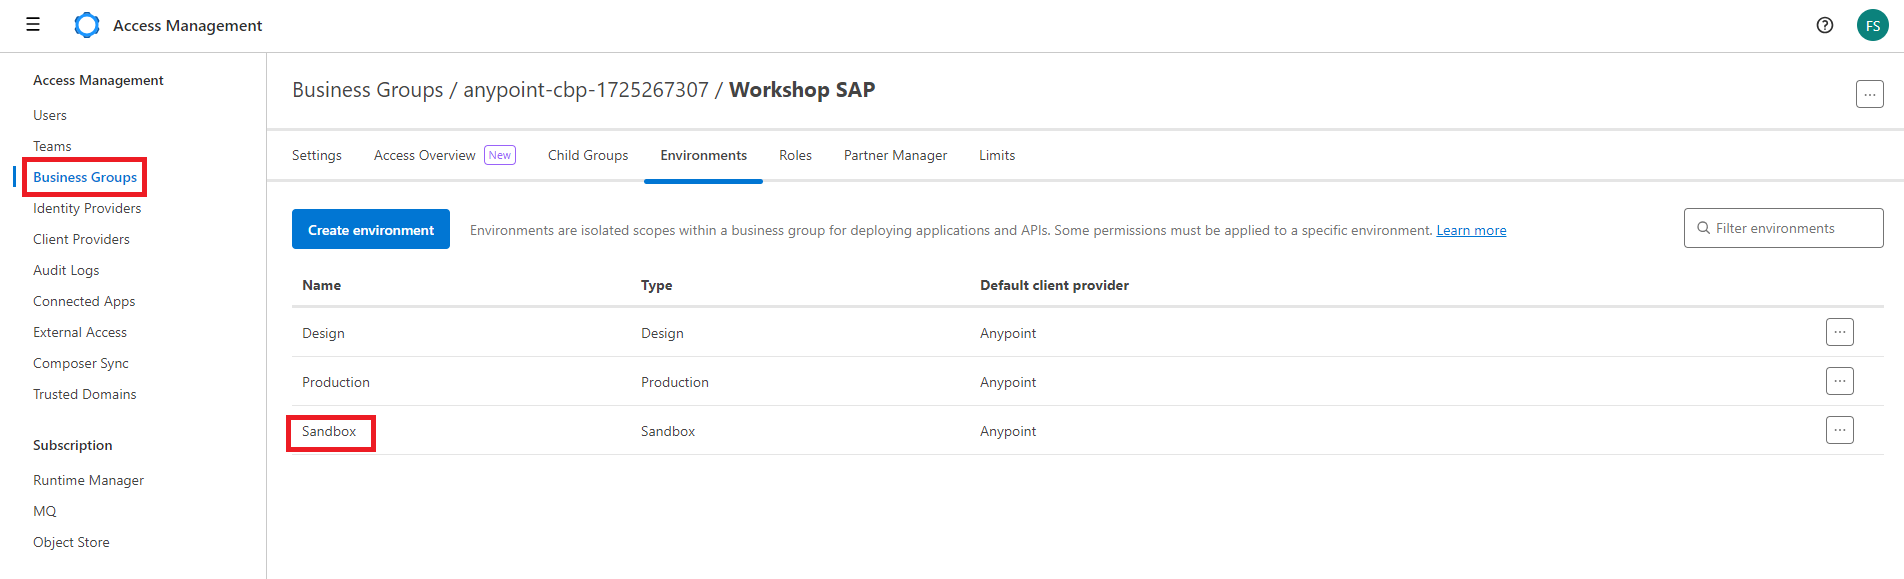
Navigate to the Anypoint Platform portal in your browser and open Access Management from the Hamburger Menu. In the left-hand navigation, click Business Group, select your SAP Workshop business group from root, then select Environments from upper tabs and then click on Sandbox
From the new popup window copy Client ID and Client Secret values.
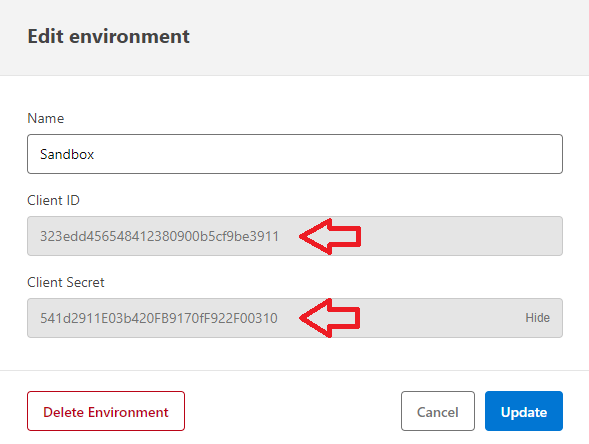
Come back to Anypoint Studio and insert these values inside anypoint.platform.client_id and anypoint.platform.client_secret fields.
Navigate to the Ingress tab and make sure to check Last Mile Security.
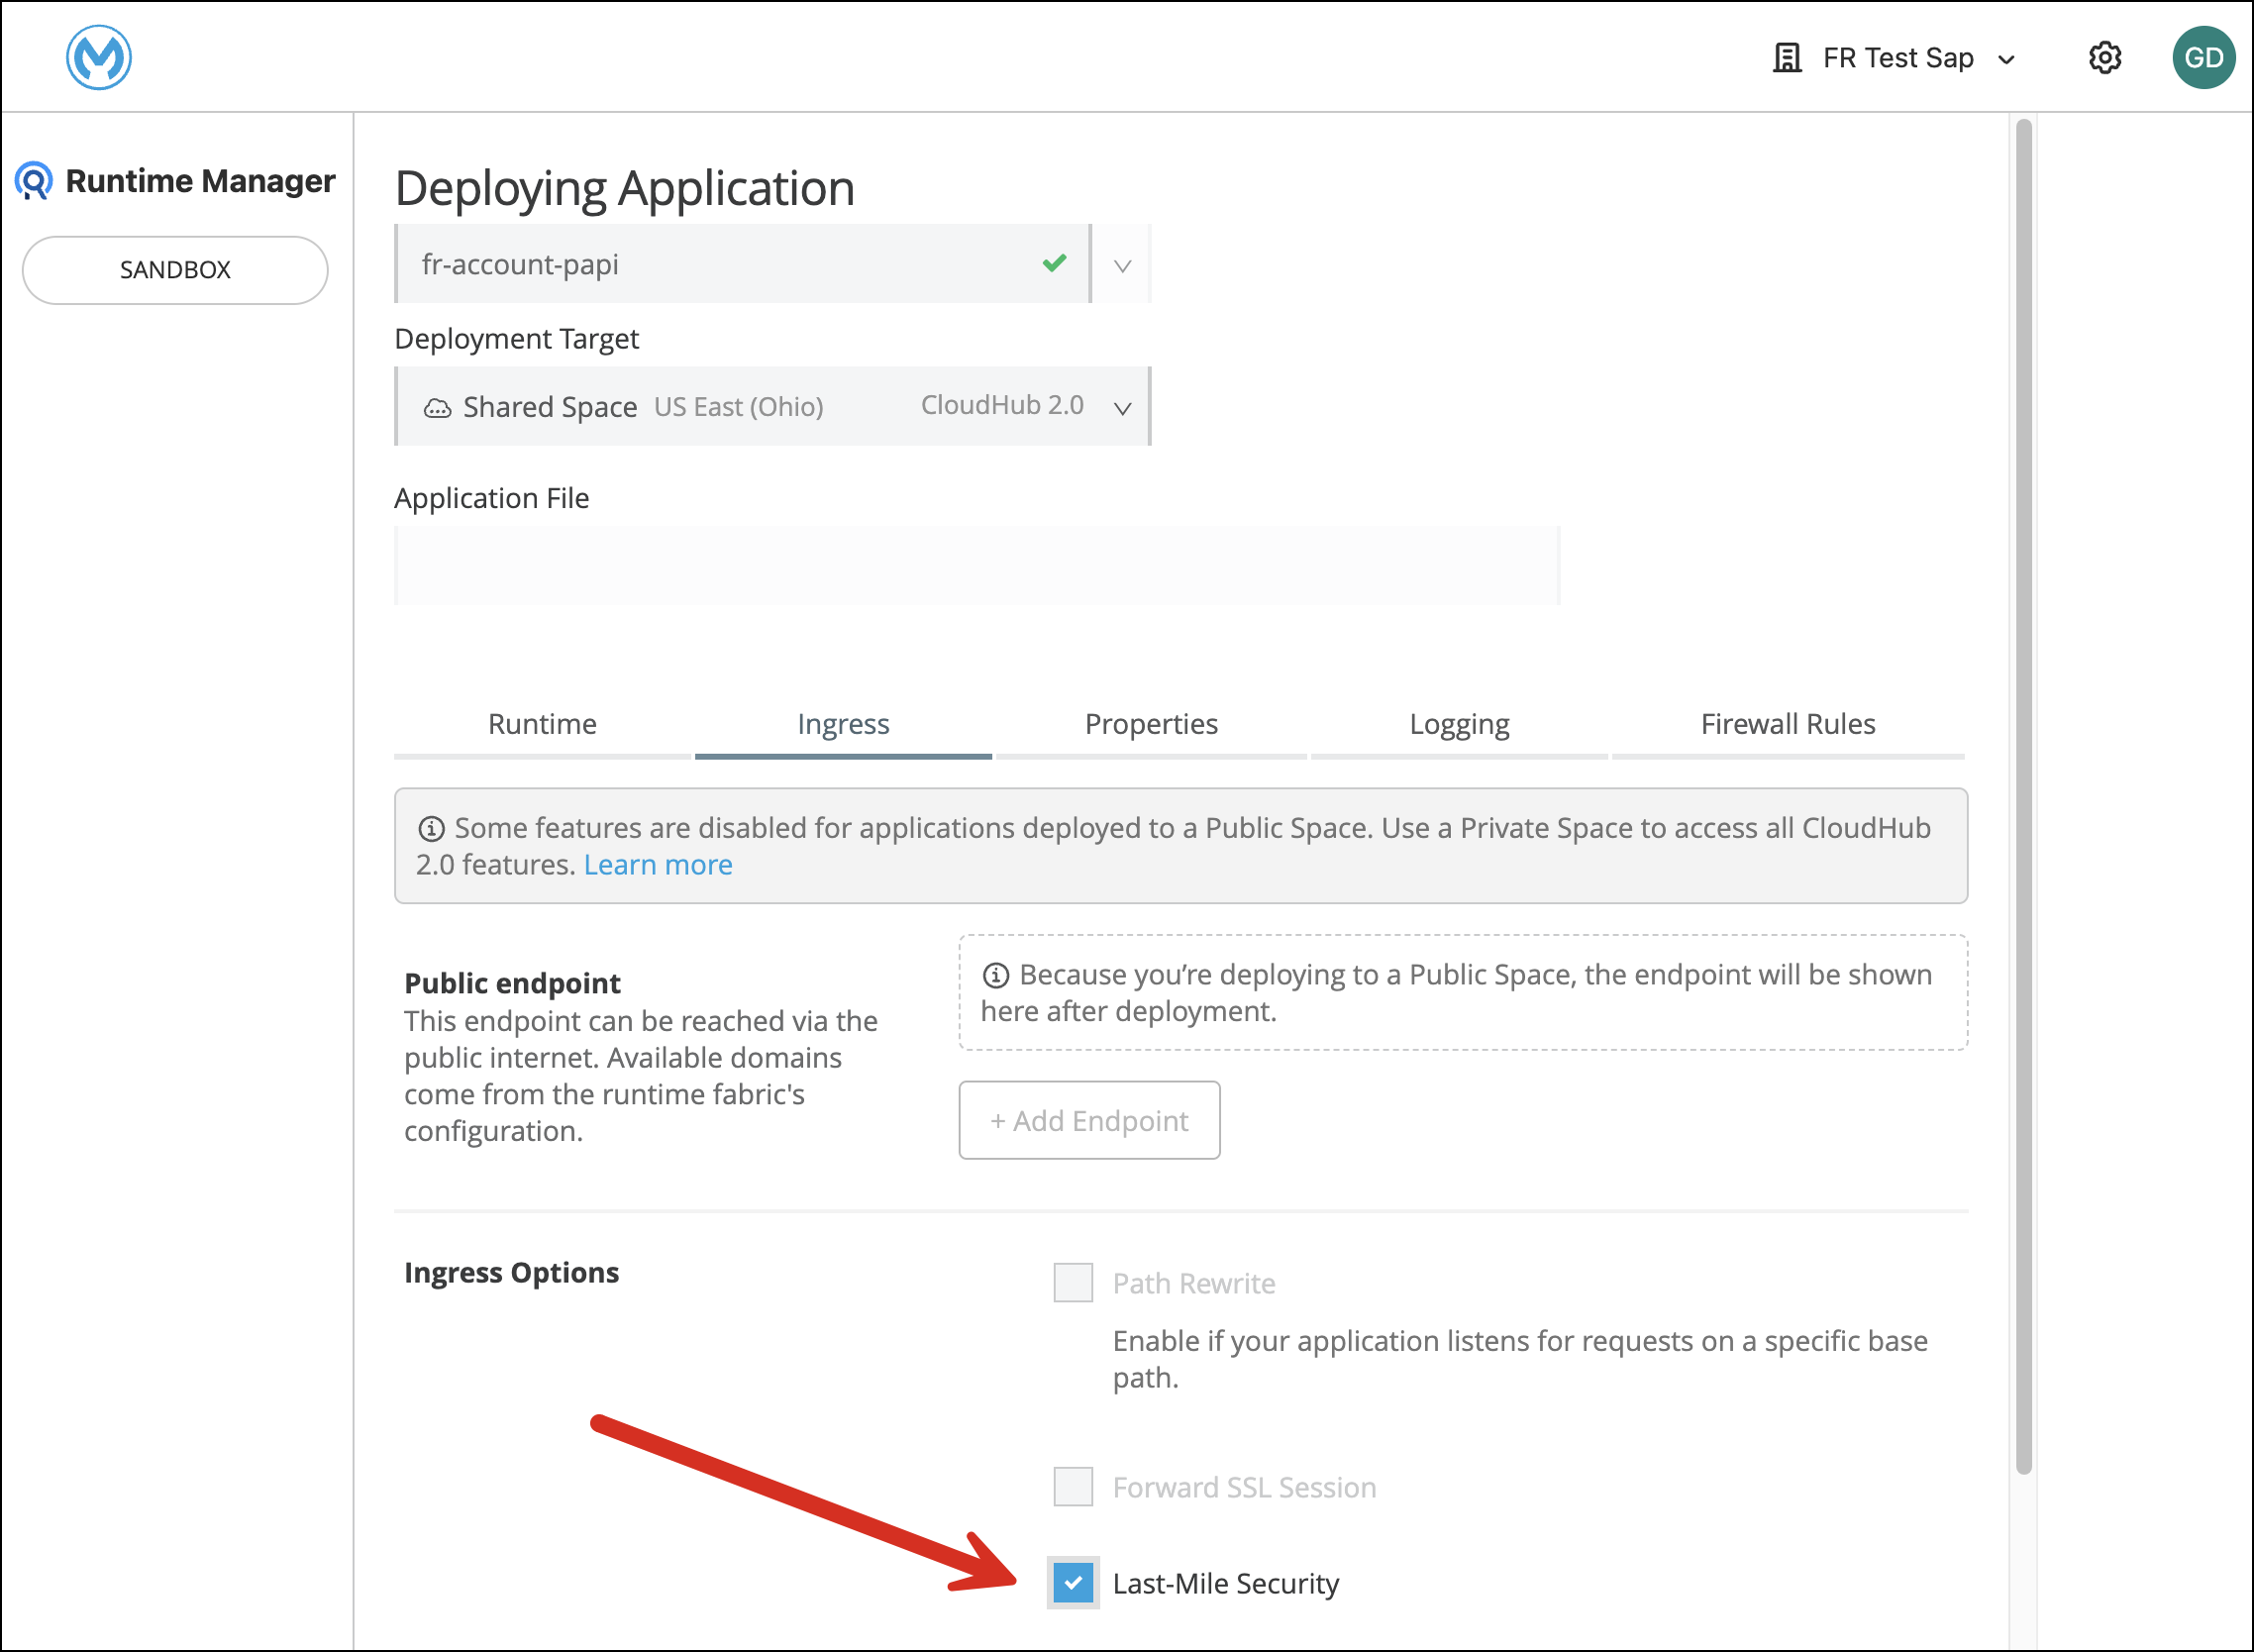
Click Deploy Application
You can close the window while the application is being deployed. CloudHub will now spin up a dedicated worker instance for your application and your application will have it’s own unique URL.