Module 1 Lab 3 - Deploy the SAP ECC System API
Overview
In Module 1 Lab 2 we implemented the SAP ECC System API to retrieve all account data but we did not implement the GET /accounts/accountName to get account details based on an accountId. To further speed up the implementation of this flow we’ll leverage an existing example published in Anypoint Exchange and create a new mule project that we’ll deploy into CloudHub.
In this Lab we will:
-
Complete our SAP ECC System API by using a pre-built example published in Anypoint Exchange.
-
Deploy the completed SAP ECC System API to CloudHub
|
If you want to learn more about CloudHub please visit: https://www.mulesoft.com/platform/saas/cloudhub-ipaas-cloud-based-integration |
Step 1: Leverage an Example from Anypoint Exchange
Anypoint Exchange provides Examples and Templates for common integration patterns and projects. They are a great way to share knowledge and reduce development time. In addition to publicly shared Examples, your teams can publish Examples and Templates specific to your business to the private Exchange.
|
If you want to learn more about Examples and Templates please visit: https://docs.mulesoft.com/design-center/import-template |
1.1 Import the Example to Anypoint Studio
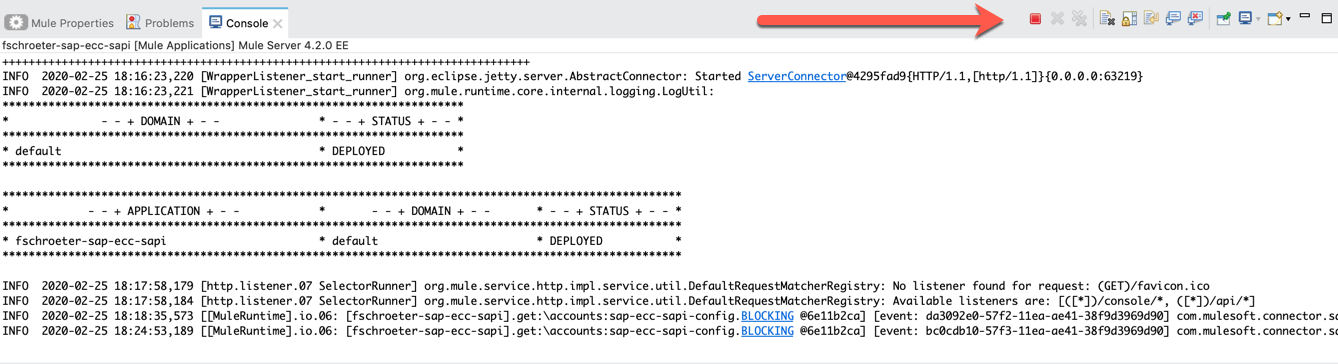
If the implementation is still running from the previous lab - please stop the running application before proceeding by clicking on the red square on the Console tab.
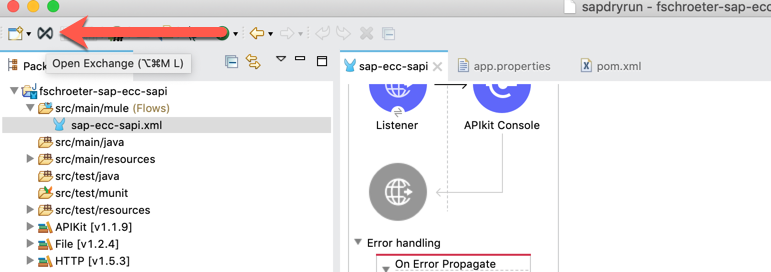
Navigate to the Exchange by clicking on the icon at the top left of Anypoint Studio.
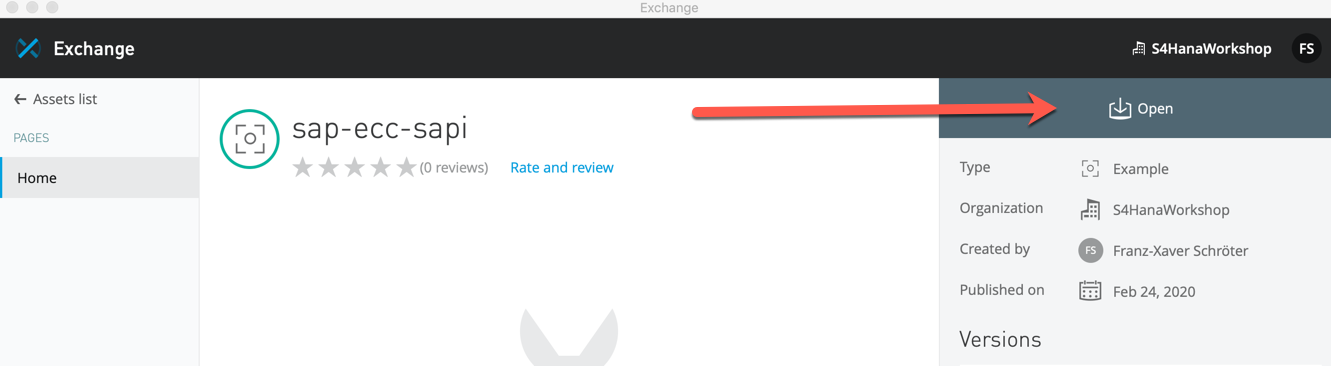
Anypoint Exchange will open in a separate window. Please search for and select the sap-ecc-sapi example.

Click Open at the top right
Upon completion, a new project that is based on the example will be created in Anypoint Studio.
1.2 Explore the Implementation
Let us briefly explore the newly imported example from Anypoint Exchange. In Anypoint Studio, you’ll notice a new project was created with the name "sap-ecc-sapi". Click and expand it to open up the sap-ecc-sapi.xml file under src/main/mule
Somethings that you’ll notice in this project that differ from the project that we created in Module 1 Lab 2 are:
-
the flow you have built in the previous lab, get:\accounts:sap-ecc-sapi-config, contains an additional Logger component.
-
get:\accounts\(accountName) is now implemented using two different sRFC processors and it is referencing a different subflow to fetch address details for each account
-
the GetAddressDetails sublfow uses a choice router to filter for empty results.

|
If after the import you encounter problems relating to libraries that are not valid/recognized, follow these 2 steps |
1) Open the pom.xml file and delete these lines inside <sharedLibraries>:
<sharedLibrary>
<groupId>com.sap.conn.jco</groupId>
<artifactId>com.sap.conn.jco.sapjco3</artifactId>
</sharedLibrary>
<sharedLibrary>
<groupId>com.sap.conn.idoc</groupId>
<artifactId>com.sap.conn.idoc.sapidoc3</artifactId>
</sharedLibrary>
<sharedLibrary>
<groupId>com.sap.conn.jco</groupId>
<artifactId>com.sap.conn.jco.libsapjco3</artifactId>
</sharedLibrary>
And delete these lines inside <dependencies>:
<dependency>
<groupId>com.sap.conn.idoc</groupId>
<artifactId>com.sap.conn.idoc.sapidoc3</artifactId>
<version>3.0.19</version>
</dependency>
<dependency>
<groupId>com.sap.conn.jco</groupId>
<artifactId>com.sap.conn.jco.sapjco3</artifactId>
<version>3.0.19</version>
</dependency>
<dependency>
<groupId>com.sap.conn.jco</groupId>
<artifactId>com.sap.conn.jco.libsapjco3</artifactId>
<version>3.0.19</version>
<classifier>external-library</classifier>
<type>so</type>
</dependency>
2) Reconfigure the connector as already done in the previous lab: https://s4hana.workshops.mulesoft.com/s4hana/S4Workshop/module1_lab2.html#1-2-configuring-the-sap-connector remembering that the JCO Native Library must be the one for Linux.
Step 2: Deploy to CloudHub
CloudHub is the iPaaS component of Anypoint Platform - a global, fully-managed, multi-tenanted, secure, and highly available platform for APIs and integrations.
[NOTE] Before the deployment step app.properties file needs to be updated with the USER/PASSWORD provided by the instructor
If you want to learn more about CloudHub please visit: https://www.mulesoft.com/platform/saas/cloudhub-ipaas-cloud-based-integration
2.1 Connect Production Environment with Anypoint Studio (OPTIONAL)
In order to deploy managed APIs to CloudHub we need to configure the environment in Anypoint Studio. We need to obtain client_id and client_secret from Anypoint Platform.
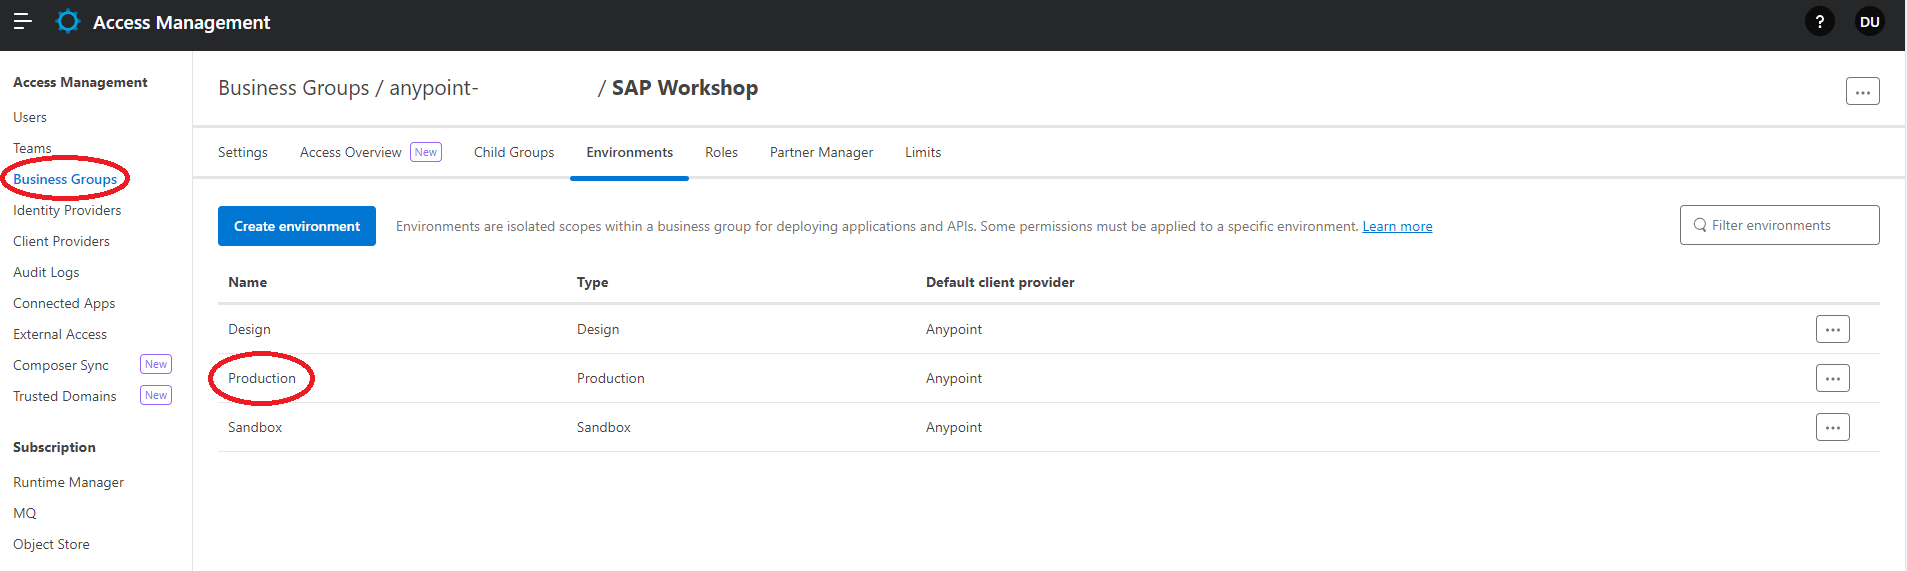
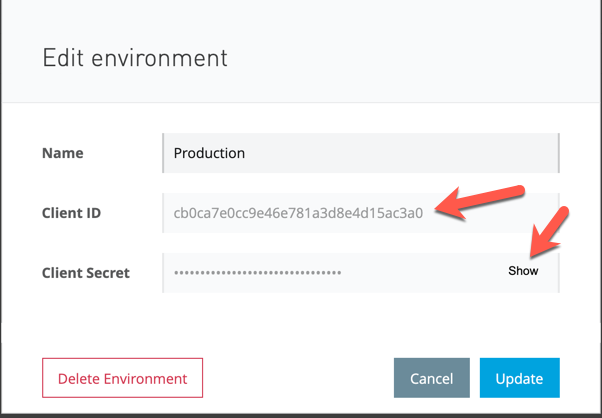
Navigate to the Anypoint Platform portal in your browser and open Access Management from the Hamburger Menu. In the left-hand navigation, click Business Group, select your SAP Workshop business group from root, then select Environments from upper tabs and then click on Production
Click Show to see the client_secret and then leave the window as is and navigate back to Anypoint Studio.
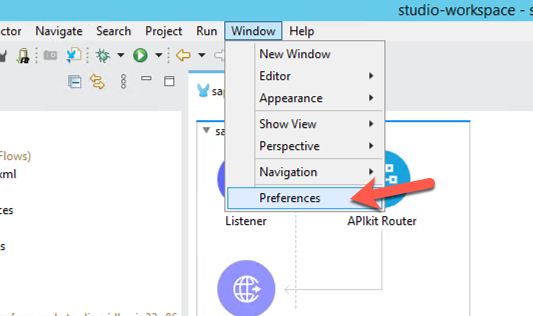
If you’re in Windows OS, click on Window > Preferences.
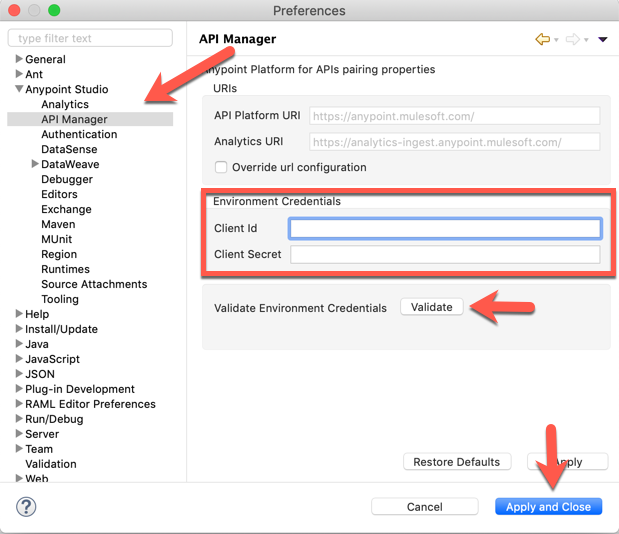
Expand the nodes on the left-hand navigation and go to Anypoint Studio > API Manager. In there, copy and paste the Client ID and Client Secret from Anypoint Platform into the Client Id and Client Secret fields under Environment Credentials.
Click on Validate and if it was configured successfully, you should see a green check mark.
Click Apply and Close to close the window.
2.2 Deploy
We can deploy application directly using Anypoint Studio, however in real world scenarios of course the deployment process can be integrated in a CI/CD pipeline for example with Jenkins and Git
| Before the deployment step app.properties file needs to be updated with the USER/PASSWORD provided by the instructor |
sap.user=
sap.pass=
sap.jcoClient=800
sap.jcoLang=en
sap.jcoAsHost=sapidp.demos.mulesoft.com
sap.jcoSysnr=00
Navigate to your application in the Package Explorer and right-click on the root folder and select Anypoint Platform > Deploy to CloudHub

A new window will open up. Please select the Sandbox Environment for your deployment
Change the Application Name to something like the following:
Application Name: <username>-sap-ecc-sapi
|
CloudHub application names need to be globally unique. If your application name is already taken please modify until a green checkmark is shown. |
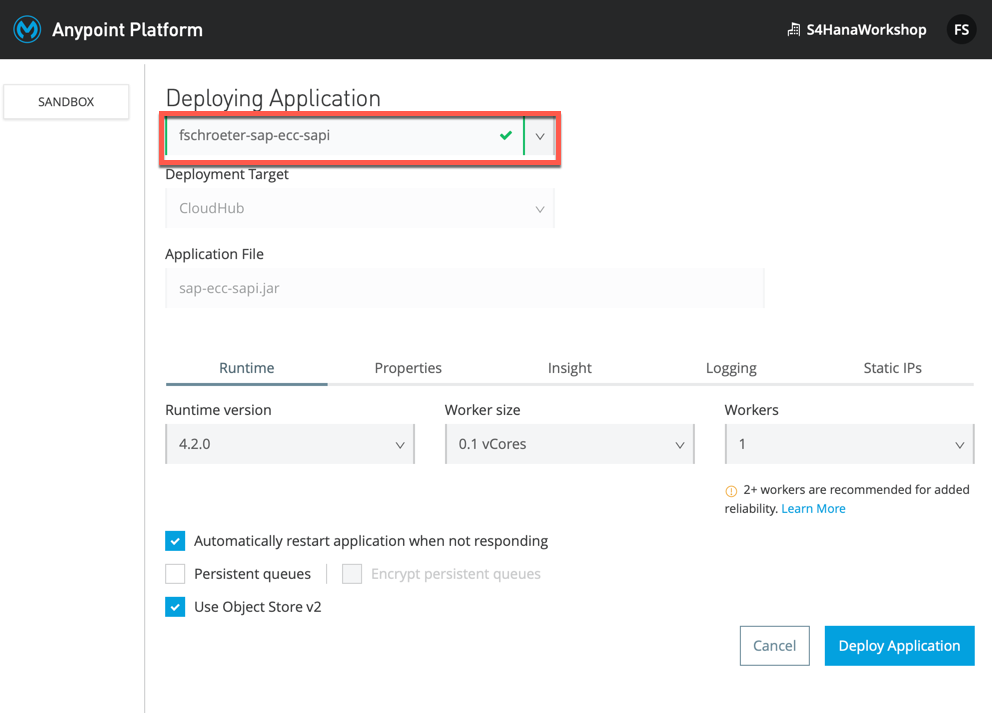
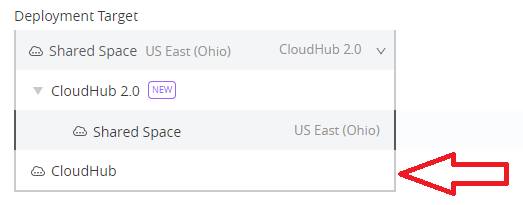
| By default “Deployment Target” is set to “Shared Space“ (CloudHub2) so it’s necessary to change it to CloudHub to deploy in the correct Cloud/Region |
Navigate to the Properties tab and add these properties below.
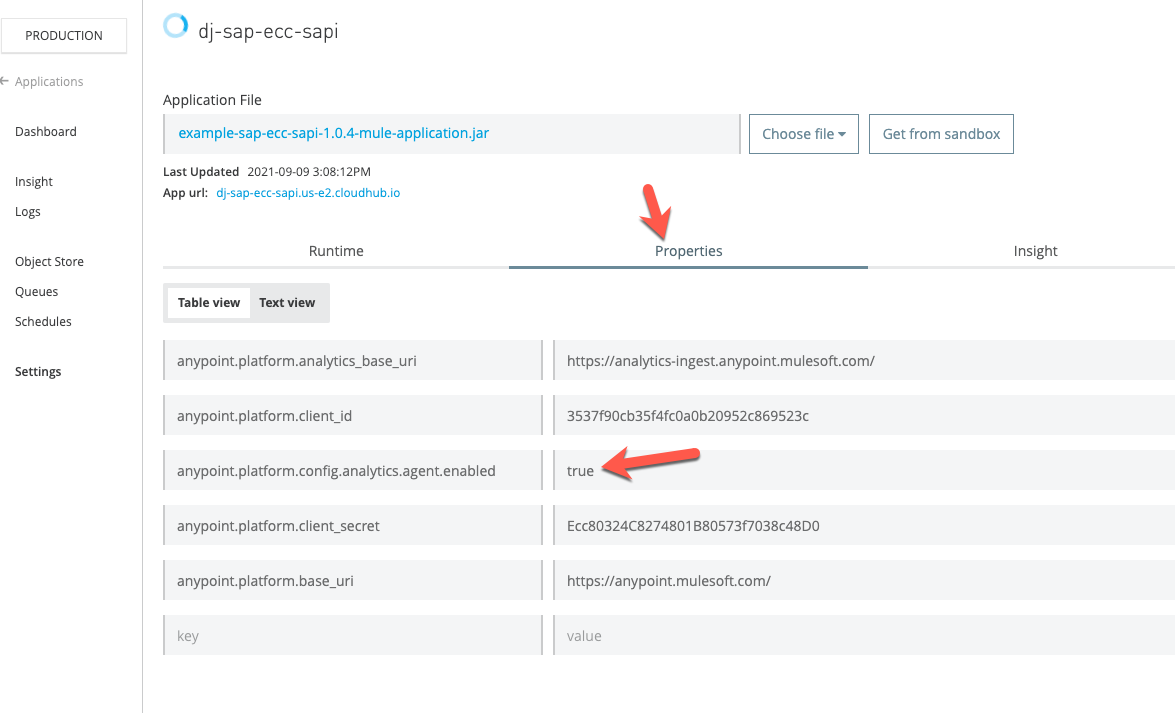
anypoint.platform.config.analytics.agent.enabled=true
anypoint.platform.client_id=e164e6229f9345ec964fc1a6276825d4
anypoint.platform.client_secret=55153414022b451bA765a7aF52176278
The value for the property anypoint.platform.config.analytics.agent.enabled is required for Anypoint Vizualizer which we will cover in a later module.
Click Deploy Application
You can close the window while the application is being deployed. CloudHub will now spin up a dedicated worker instance for your application and your application will have it’s own unique URL.