Module 3 Lab 1 - Enhance the Account Process API
Overview
In Module 2, you implemented and deployed a SAP S/4HANA System API. In this module, you’ll modify an existing APi called the Account Process API to make use of the System APIs that you’ve created and deployed. In this lab, we’ll work on the following:
-
Enrich the Account Process API with S/4HANA data using the API that we created and deployed.
-
Re-deploy the Account Process API
-
Experience the result in our 360 Account Application
Step 1: Open the Account API in Studio
Create a new project in Anypoint Studio by using the example Account API from Exchange. In Anypoint Studio, click on the *Exchange icon in the menu bar.
Search for the account-papi API Example
Click Open

Once the example is loaded in Anypoint Studio, let’s take a look what is implemented so far.
We can see that two GET Methods are implemented
-
get: accounts
-
get: accounts/(accountName)
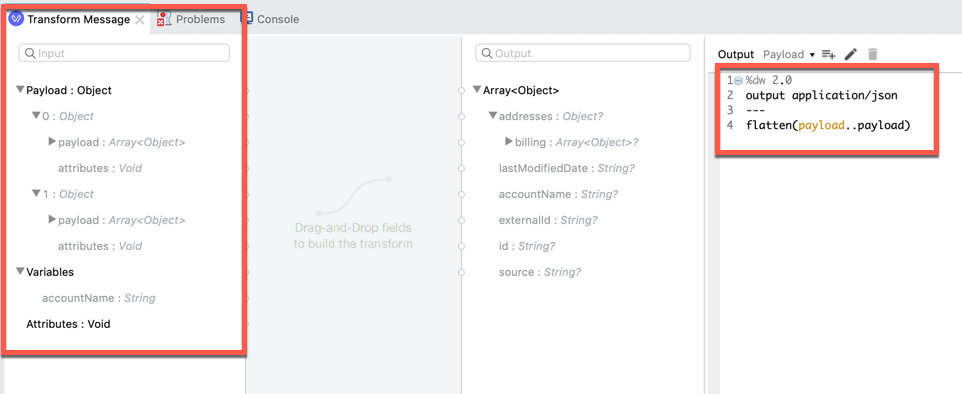
We already know that these two resources have been implemented in the underlying System APIs in the previous two modules. In this API, you can see that those System APIs are called by a Scatter-Gather scope which executes synchronously to retrieve Account information from Salesforce and SAP ECC.
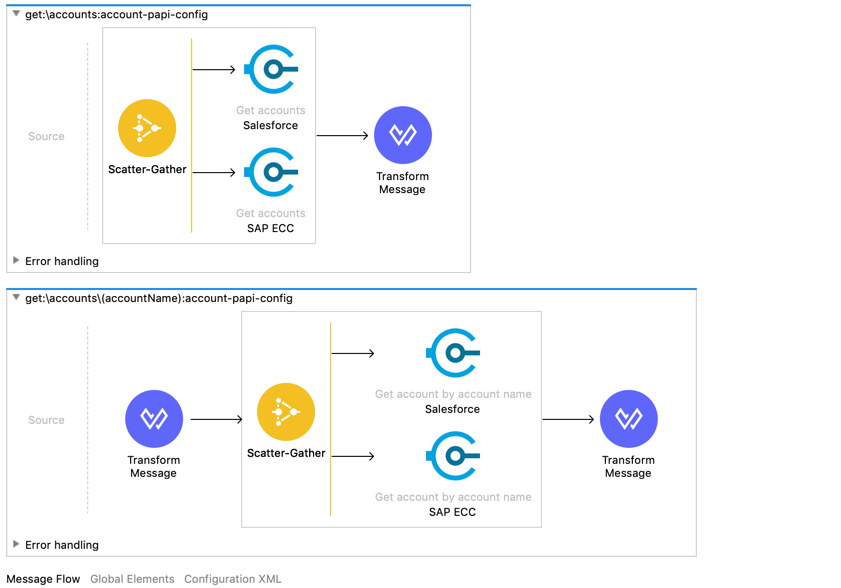
Also have a look at the Transform Message component. Thanks to our standardized data model we do not require any further mapping. The Scatter-Gather scope is returning an object with the multiple payloads from within the scope.
In the DataWeave we simply navigate two hierarchies down by .. and flatten the output of the different indexes so one standalone array will be returned.
As a result, any further amendment of the Scatter-Gather using the same data model does not require any further configuration or scripting.
Step 2: Configure your API
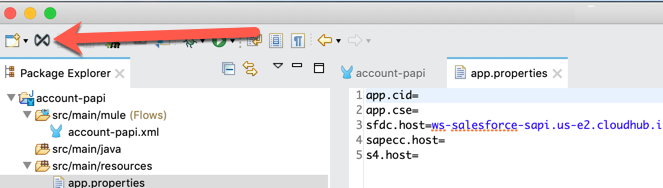
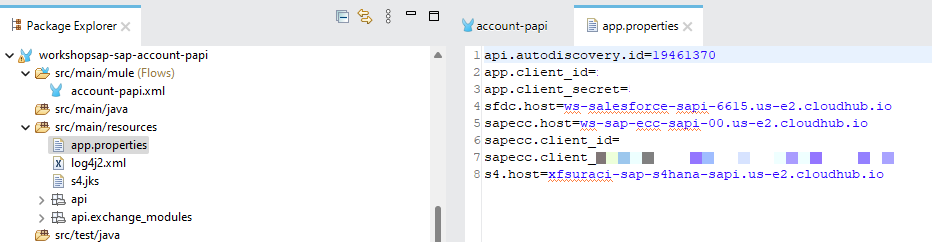
Navigate to the app.properties file under src/main/resources.
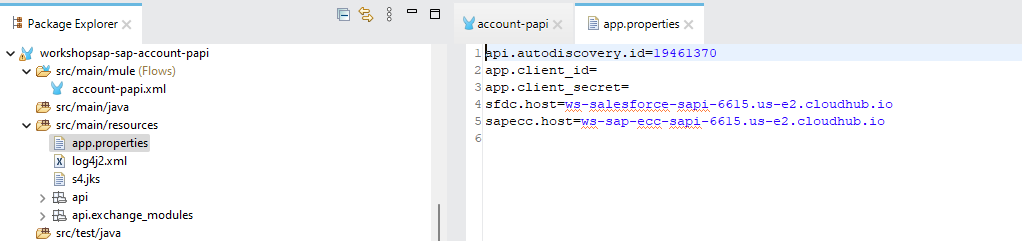
This file contains the properties for the Account API application. The project is configured to use two System APIs currently and we’ll be adding a third API for this lab.
-
sapecc.host=
-
sfdc.host=
You will also notice the following properties are currently blank:
-
app.client_id
-
app.client_secret
These properties reflect the Client ID and Client Secret of a client application that will be calling the API instance. Instances that are protected by a client ID enforcement policy require client applications to provide a client ID and client secret. The client ID and client secret credentials are automatically created when the client application is registered in Anypoint Exchange. We’ll walk through the process of requesting access to an API instance and retrieving the client ID and client secret in Step 3.
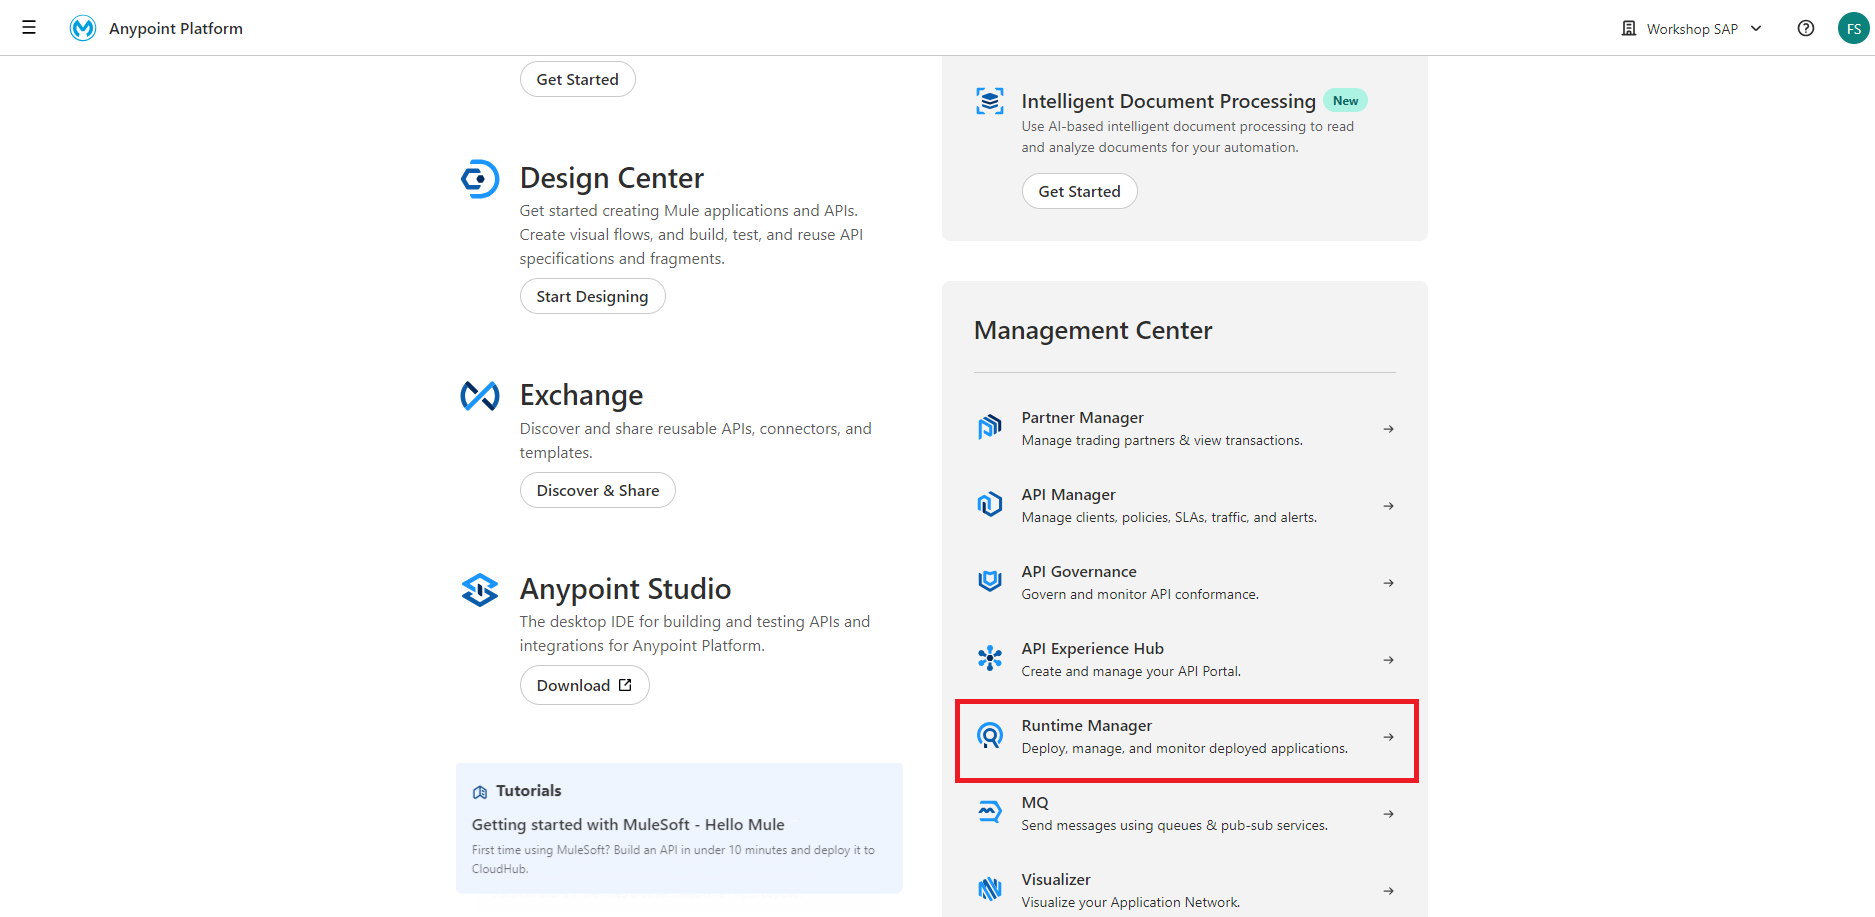
Navigate back to the Anypoint Platform and open Runtime Manager.
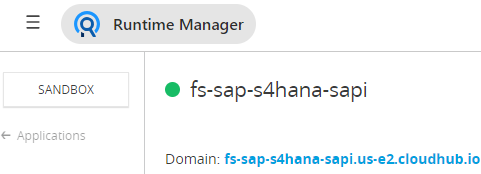
Click and open the SAP S/4HANA System API. The Dashboard will show the hostname for the deployed application next to the Public endpoint label.
-
e.g. <initials>-sap-s4hana-sapi
For this hostname, we need to create a new property in the app.properties file named s4.host. Create the property and paste the hostname for the SAP S/4HANA System API into the file.
-
s4.host=<initials>-sap-s4-hana-sapi.us-e2.cloudhub.io
At the end,the app.properties file should look like the following screenshot below now. In the next step, we’ll be registering a client application to fill in the Client ID and Client Secret.
Step 3: Register a Client Application
Now we have the hostnames setup in the file, let´s generate a Client ID and Client Secret for the SAP APIs in order to access our secured System APIs. Our secured System APIs require access control via a registered Client Application.
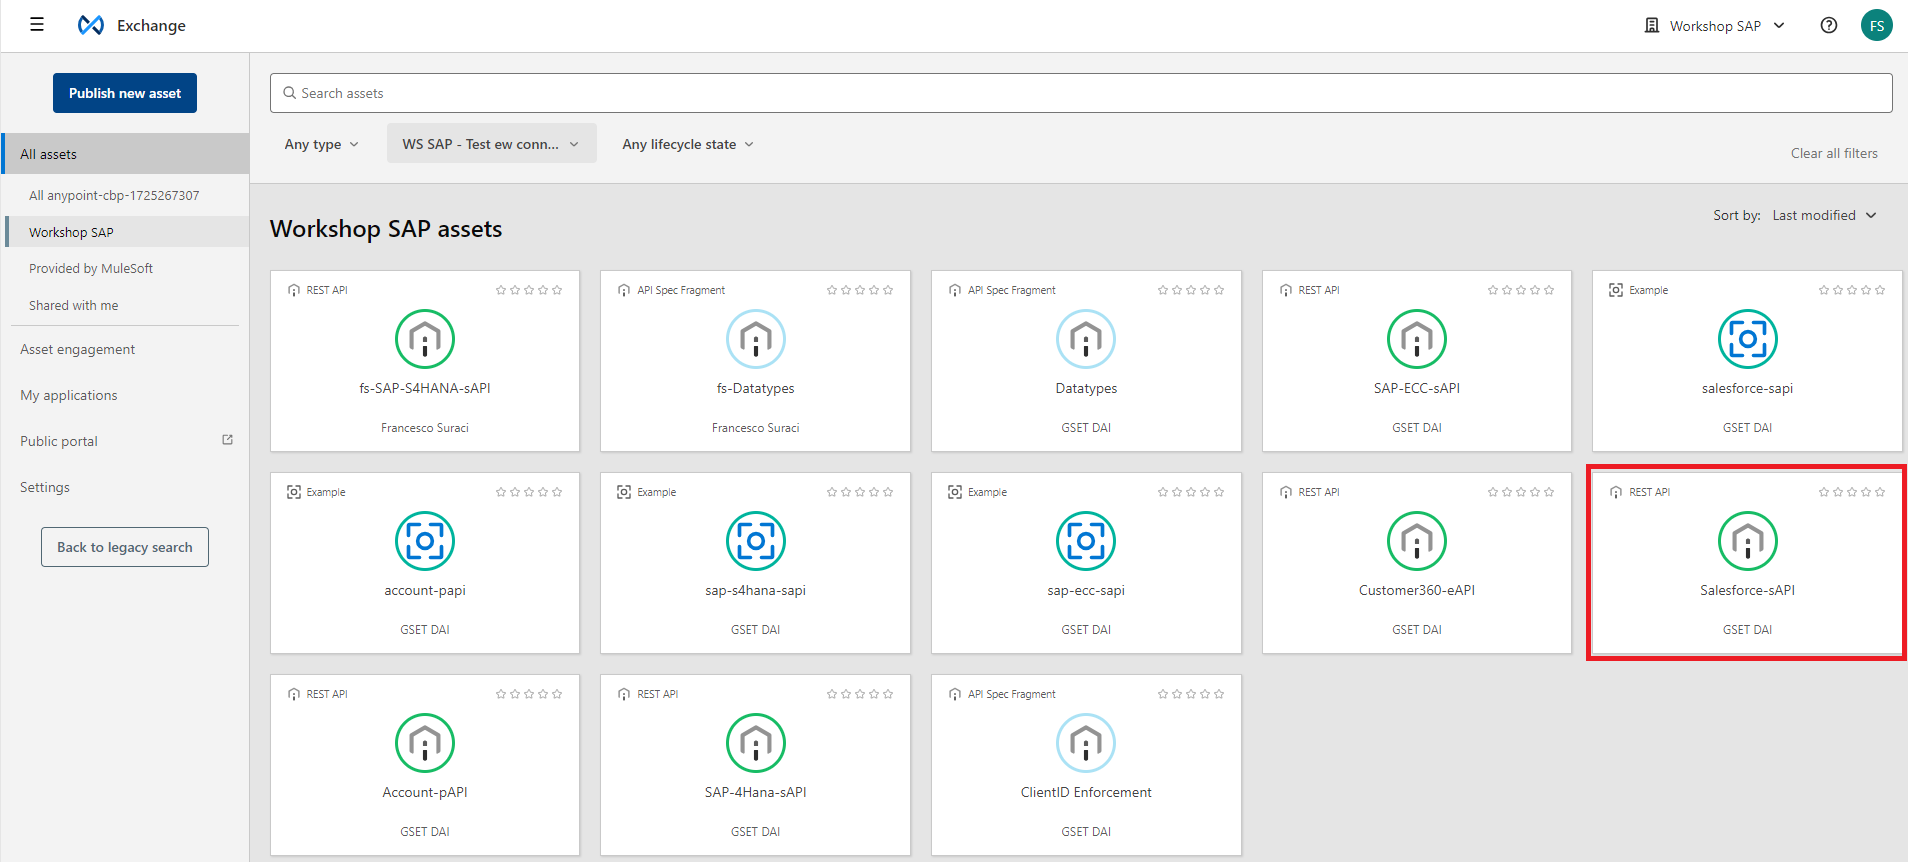
Navigate to Anypoint Exchange and locate the Salesforce-sAPI in Exchange.
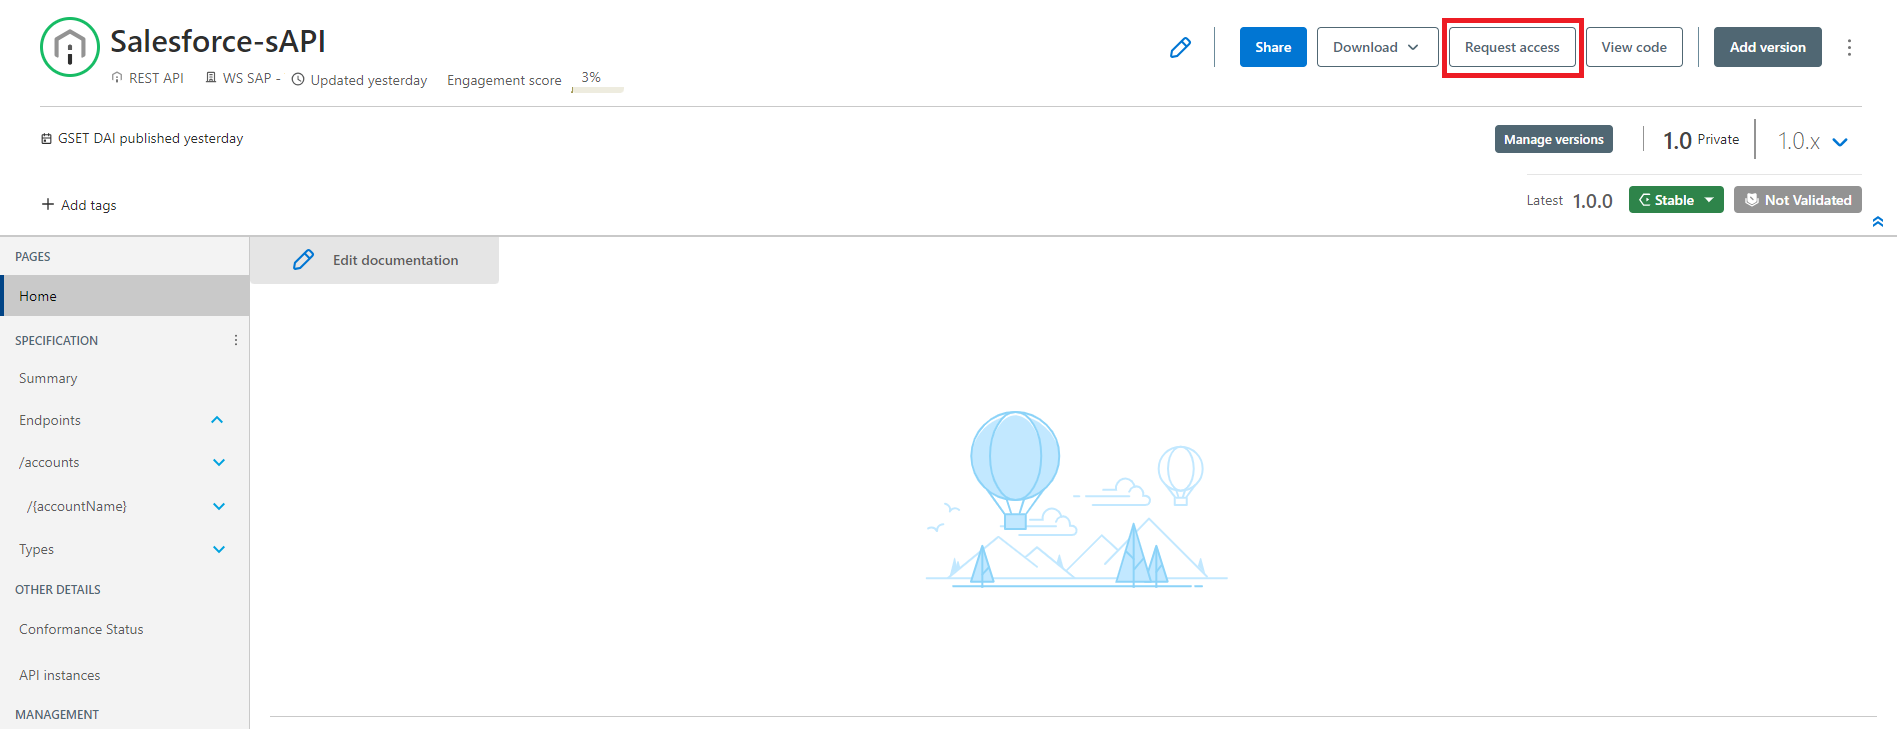
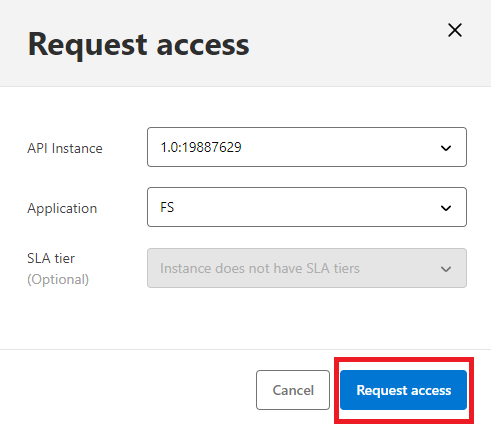
In the Salesforce-sAPI page, click on Request access.
In the Request access window, select the first API instance under the API Instance field. And for the Application field, click on Create a new application.
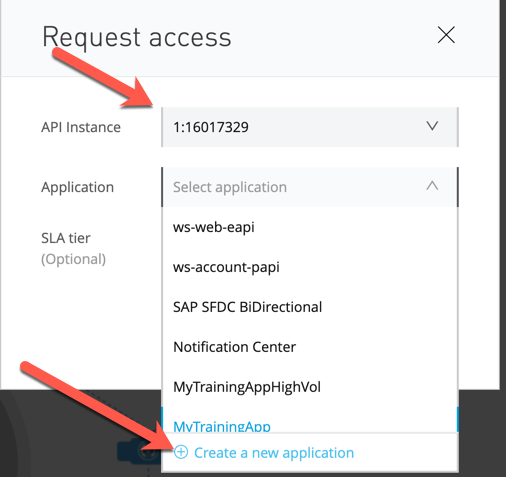
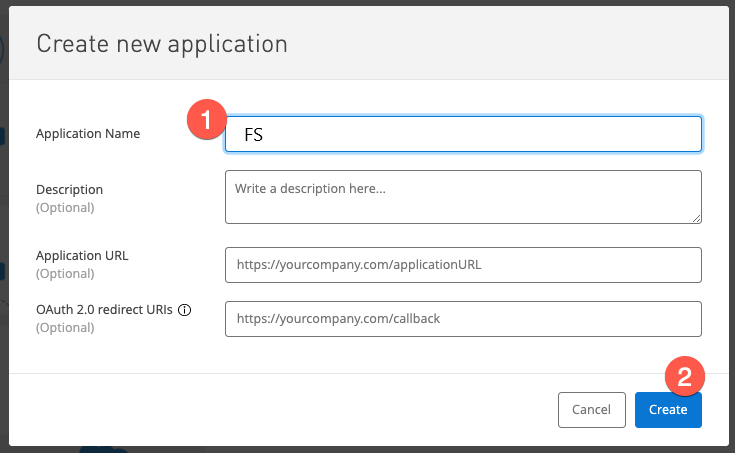
Give your application a name (e.g. <initials> Application) and click on Create
Click Request access
Repeat the previous steps for the following API, and be sure to select the application (e.g. DJ Application) that you created instead of creating a new one for each.
-
<your initials>-SAP-S4HANA-sAPI

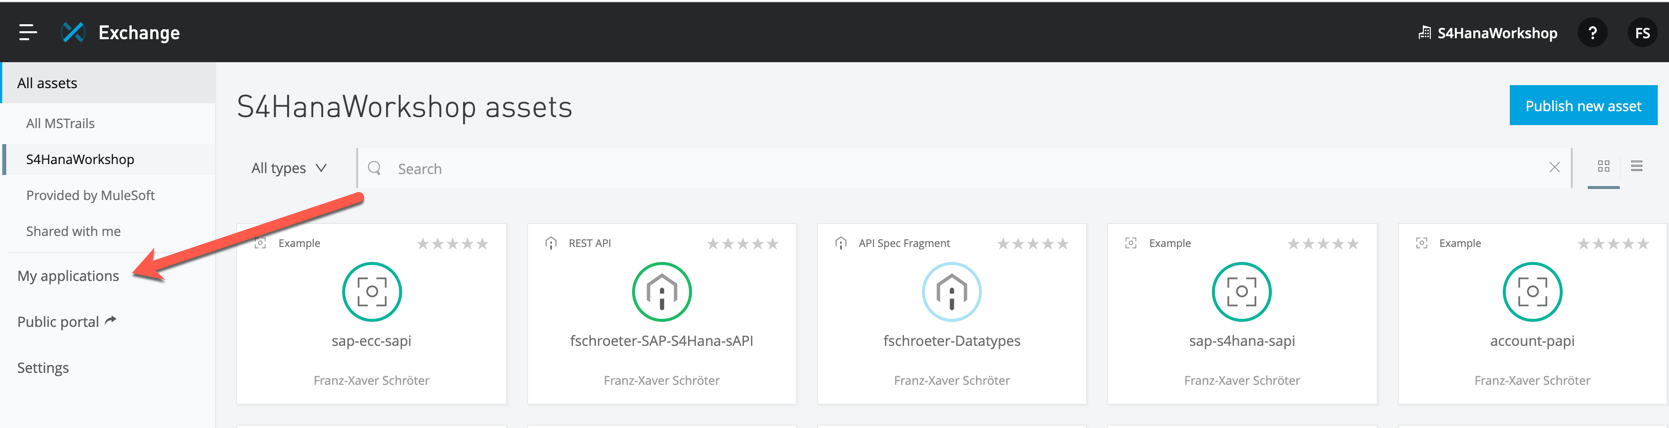
Afterwards, you can access your application by navigating to the main Exchange page and click on My applications in the left-hand navigation bar.
Select the application that you created (e.g. DJ Application) and obtain the Client ID & Client Secret

On the left-hand side of the page, you can see to which APIs have been registered against this application and as you start making calls against these APIs, you will begin to see usage statics.
Take the Client ID and Client Secret and copy and paste them in to your app.properties file back in Anypoint Studio (overwrite the values).
Step 4: Configure the SAP S/4HANA System API
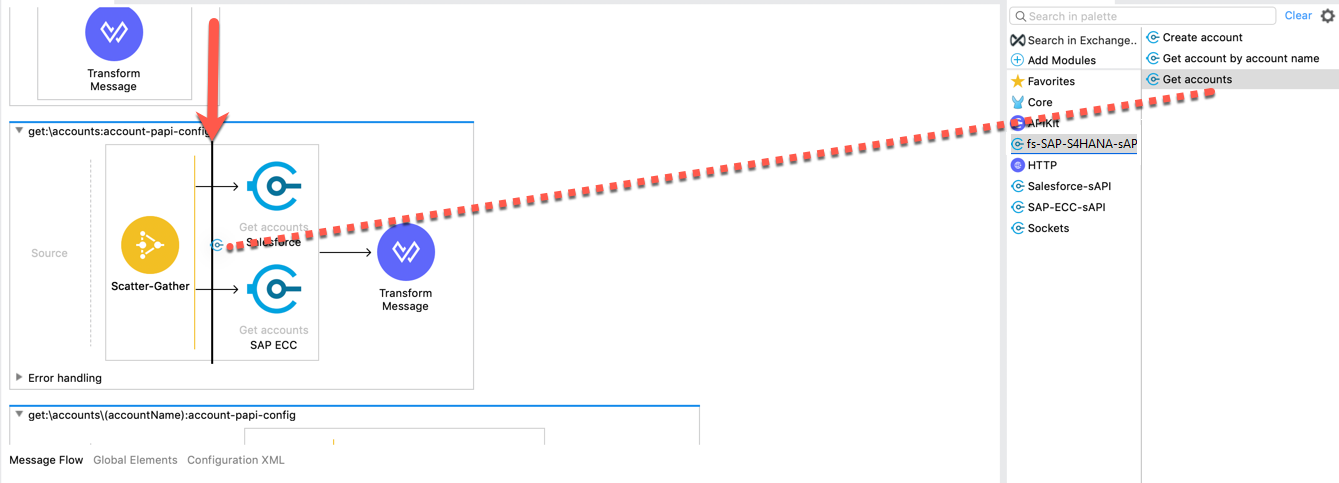
Back in Anypoint Studio, navigate back to the application canvas and locate the two implemented flows
-
get: accounts
-
get: accounts/(accountName)
In the Mule Palette, click on Search in Exchange for your SAP S/4HANA System API. Add the <initials>-SAP-S4HANA-sAPI to your project.
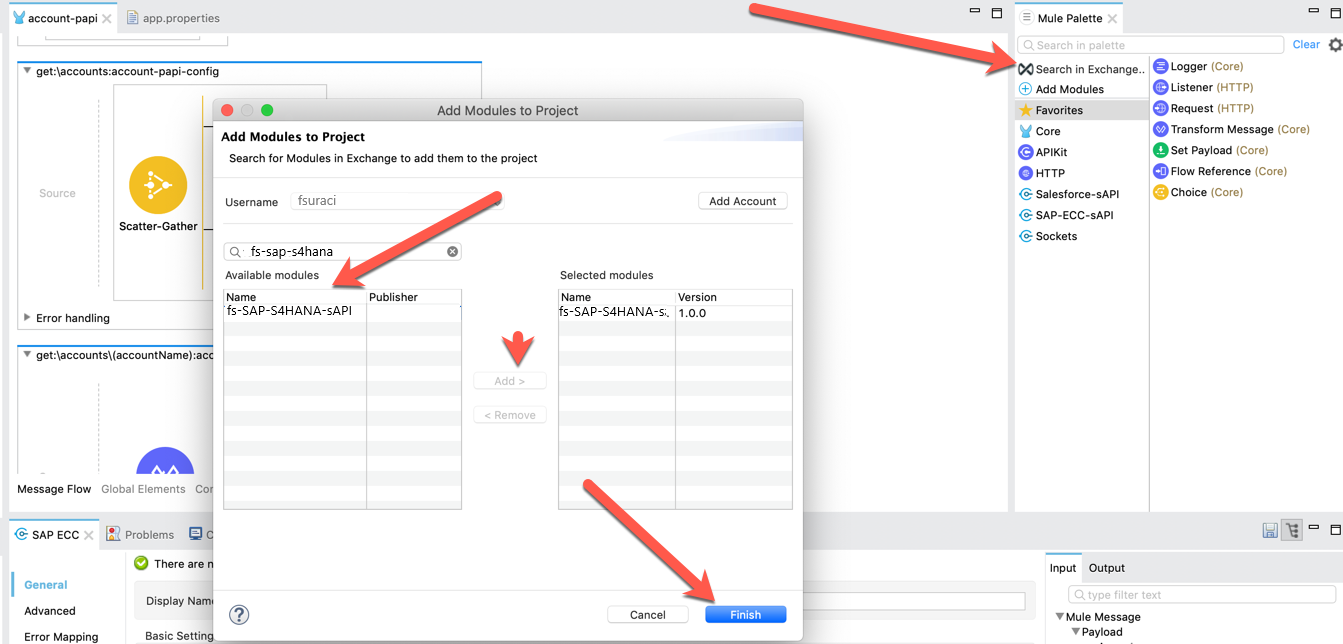
Now your API has been added to your project and you can find it as an additional Module in your Mule Palette
Modify the get: accounts flow and add the Get accounts operation from the SAP S/4HANA API to the Scatter-Gather scope.
|
Make sure that when dropping the Get accounts operation into the Scatter-Gather that the black line appears same as in the screenshot below |
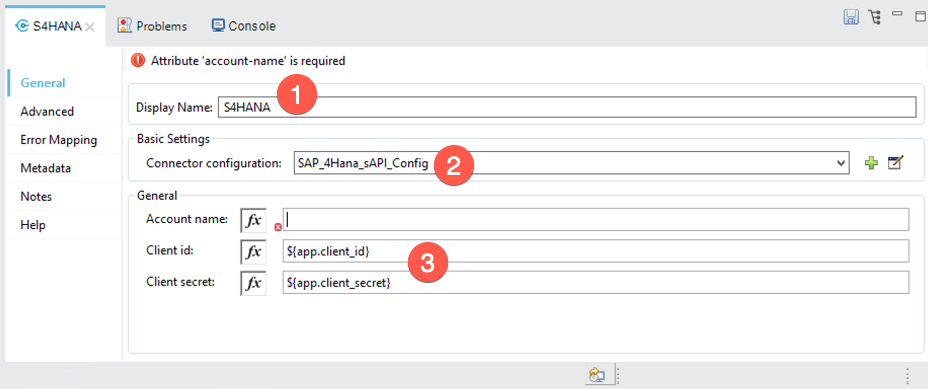
Next we need to configure the Get accounts operation. Click on the Get accounts operation that you just added to bring up the properties tab. Rename the Display Name to S4HANA and then click on the green plus sign next to the Connector configuration field.
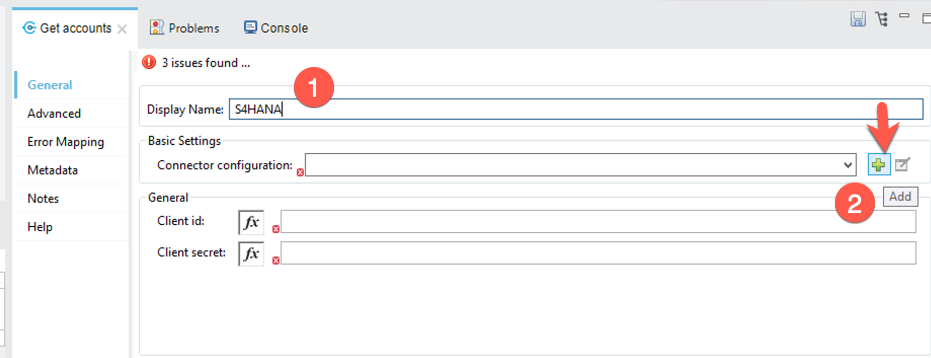
Fill in the fields that match the properties in the table below.
host: |
${s4.host} |
port: |
443 |
base Path : |
/api |
protocol : |
HTTPS |
|
We have already set our app.properties to know the host of our API - we simply need to reference it now |
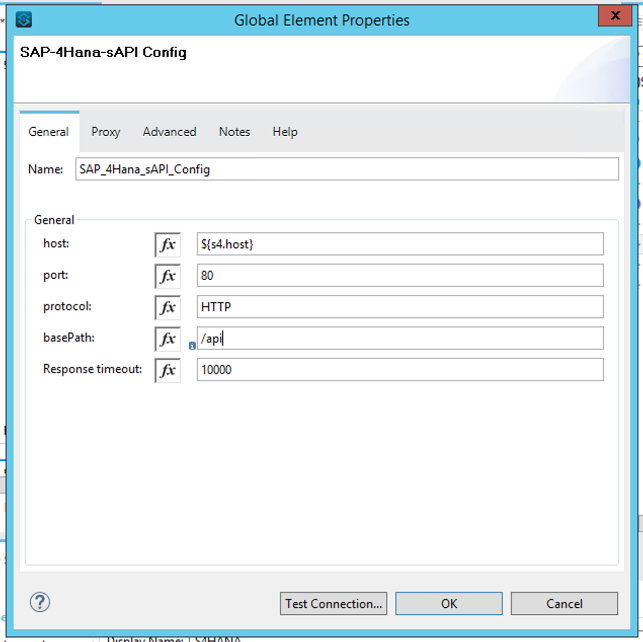
Now we need to finalize the configuration by providing Client ID & Client Secret from our app.properties
Client id: |
${app.client_id} |
Client secret: |
${app.client_secret} |
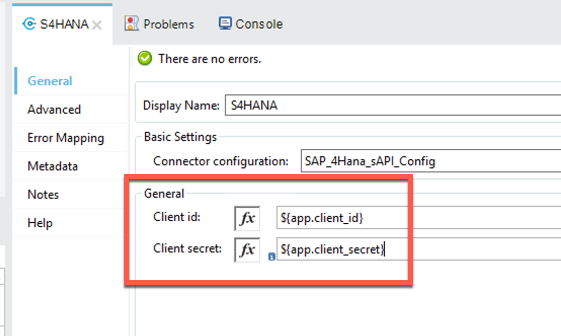
Next, update the get: accounts/(accountName) flow. You’ll repeat most of the steps that we just ran through for the get: accounts flow.
-
Drag and drop the Get account by account name inside the Scatter-Gather
-
In the properties tab
-
Rename the Display Name to S4HANA
-
The Connector configuration should default to the one we created. If not, select it.
-
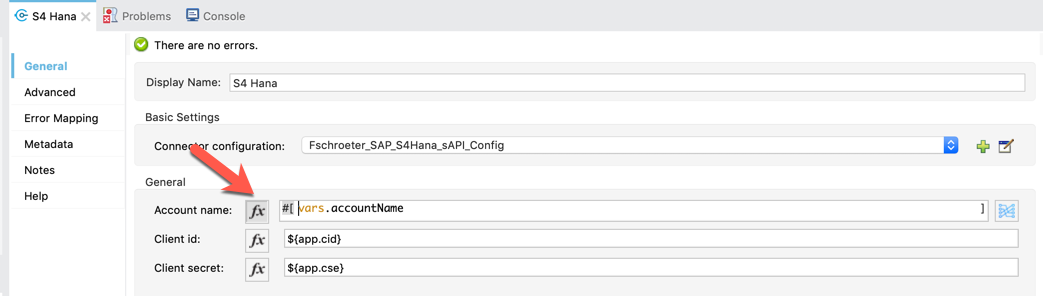
Finalize the configuration with the Client ID and Client Secret from the app.properties
-
You might notice that we still need to provide a value for the Account Name field. Similar to what you configured in Module 2 Lab 2, a variable has been created based on the API specification to contain tha account name that is passed into the API call.
Activate the formula field and type in vars.accountName